List view
Select Session Journey from the left menu of the dashboard to open the list of submissions (sessions). Each row is one session (the verification progress record for a single submission), and clicking a row navigates to that session’s detail view.Columns
| Column | Description |
|---|---|
| Created (UTC+9) | The time the session was first created (Korea Standard Time) |
| Session ID | Unique session identifier |
| The email entered by the user | |
| User ID | The user identifier assigned by the project |
| Submission ID | The identifier of the created submission (shown as — before Step1 is passed) |
| Last event | The name of the most recently recorded event |
| Last update | The time the last event was recorded |
| Status | The overall progress status of the session (COMPLETED · IN_PROGRESS · DROPPED · ERROR) |
A session whose
Submission ID is — is a session that stopped at the stage before a submission was created (Step1 not yet passed). For when the submission is created, see the SUBMISSION_CREATED event in the event reference.Status values
The Status column in the list shows the overall progress of the session as a colored chip.| Status | Color | Meaning |
|---|---|---|
COMPLETED | Green | Completed — the user finished the journey to the end (approval, rejection, or hold all possible) |
IN_PROGRESS | Blue | In progress — the final result has not yet been reached |
DROPPED | Orange | Drop-off — the user left without completing the journey (the final result page was not reached) |
ERROR | Red | Error — left the normal flow, e.g. via an error page |
A
DROPPED session is a case where the user left without finishing verification, so the email, User ID, and Submission ID are often empty (—) and the last event often ends with a pre-drop signal such as PAGE_HIDDEN or PAGE_VISIBLE. Use this for analyzing drop-off points.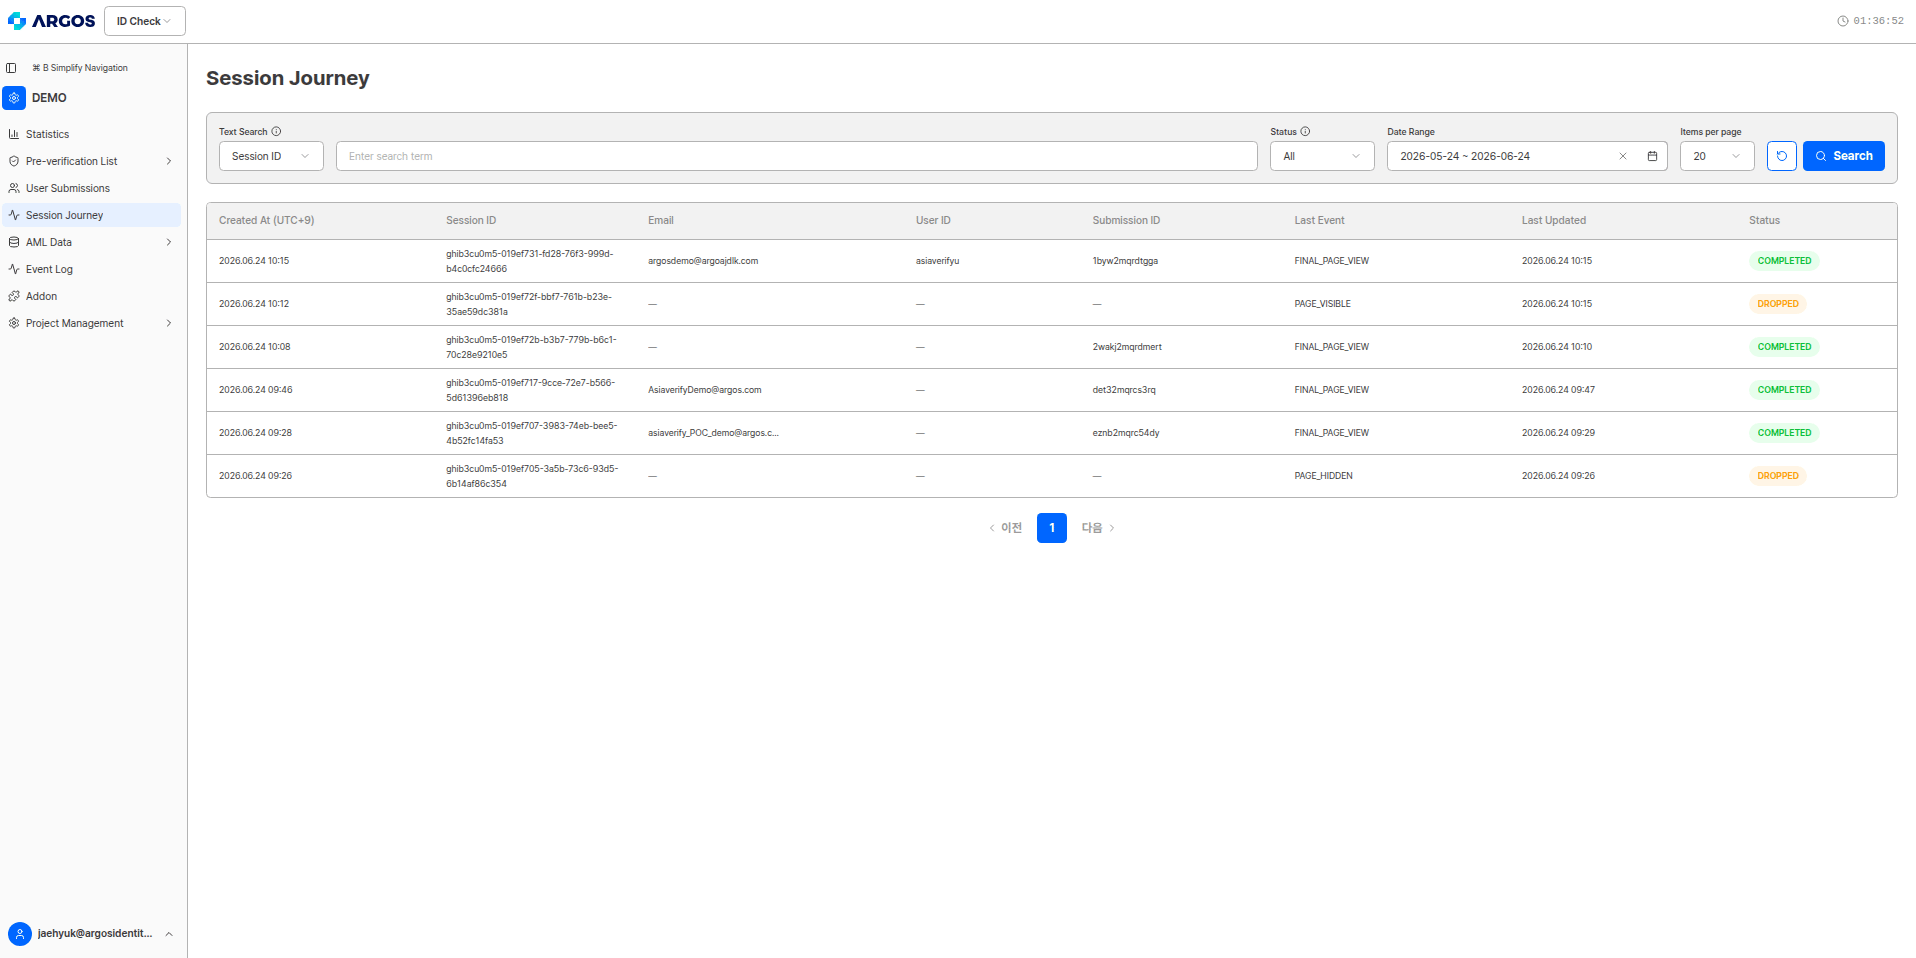
Search & filter
At the top of the list, you can find sessions using the following conditions.- Text search — Select the target field (e.g.,
Session ID) and enter a search term. - Status — Filter by
COMPLETED,IN_PROGRESS,DROPPED,ERROR, or all. - Date range — Specify the lookup period based on the creation date.
- Items per page — Set the number of rows to display on one page (e.g., 20).
Detail view
Clicking a session in the list opens that session’s detail view. At the top, a data expiration banner is shown alongside the session status chip.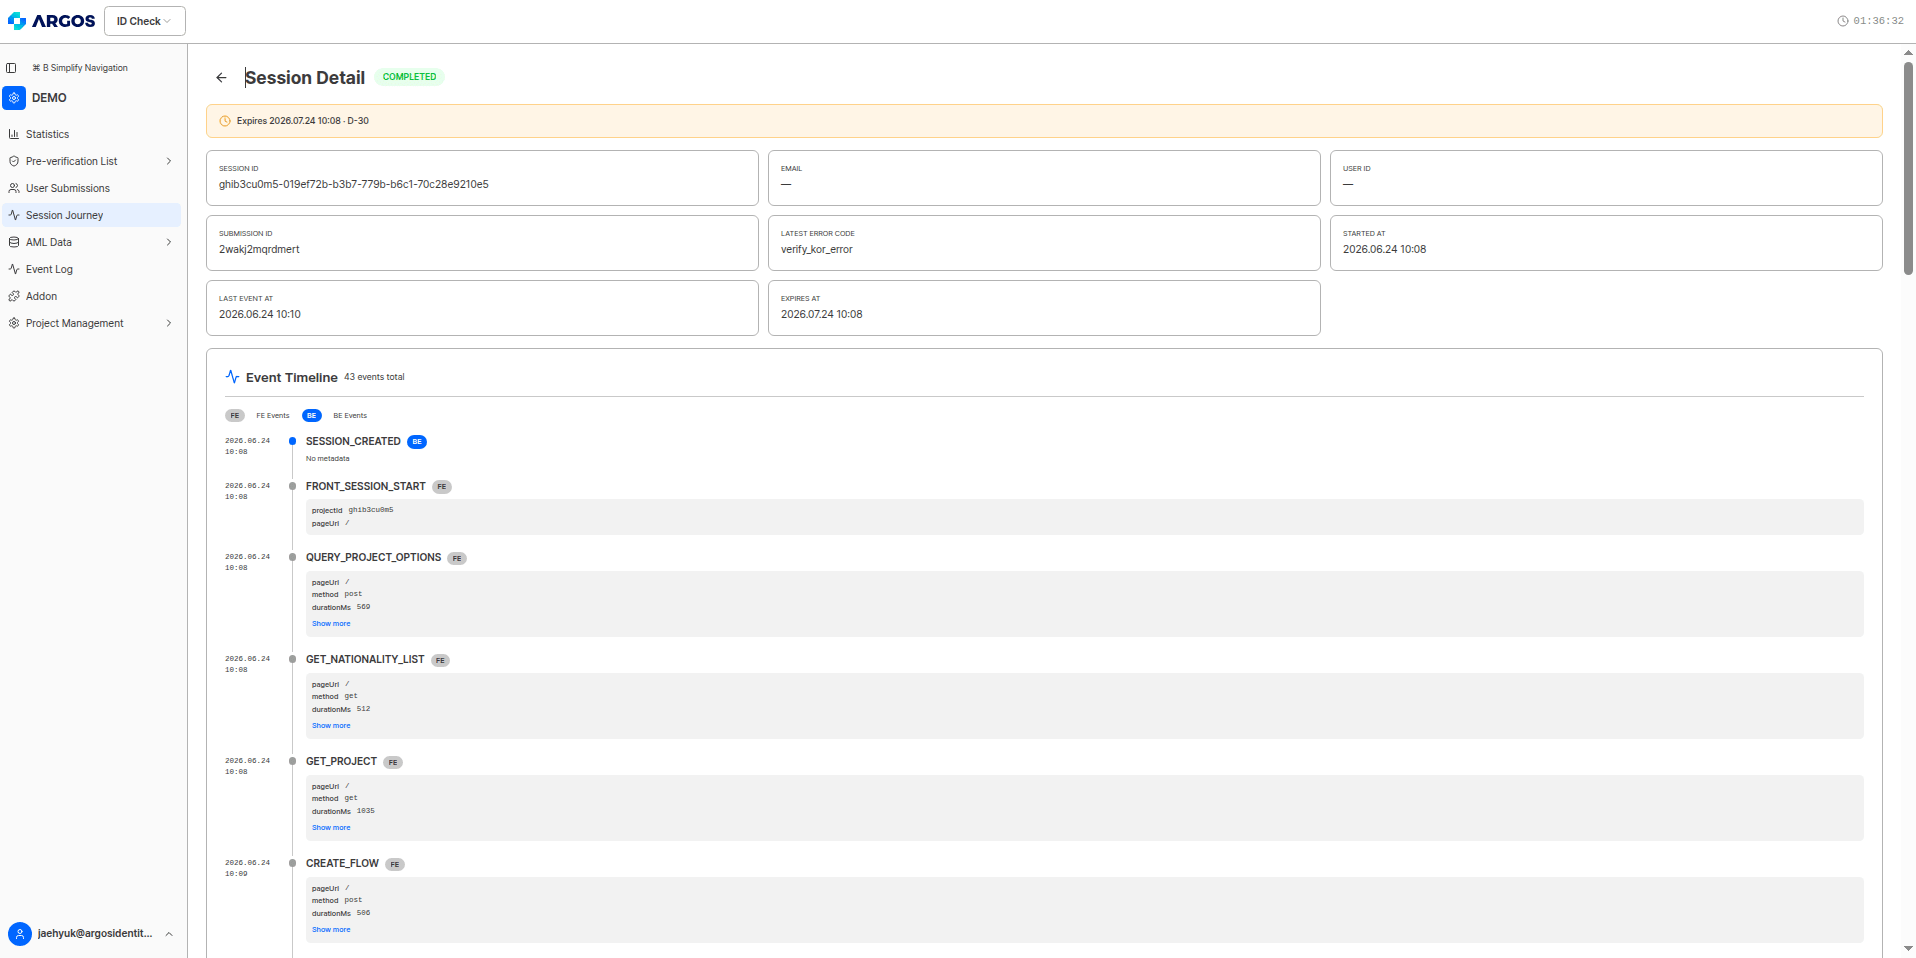
The expiration banner (e.g.,
2026.07.24 10:12 Expires At · D-30) indicates the expiration date and remaining days (D-day) for which this session’s detail records are retained. After expiration, detail event records can no longer be viewed, so if long-term preservation is needed, check before expiration.The retention period is determined by the Session Journey Data Retention Period (default 30 days) under Project Settings > System Operations.Summary card
The summary card at the top of the detail view gathers and displays the session’s key information.| Field | Description |
|---|---|
| SESSION ID | Unique session identifier |
| The email entered by the user | |
| USER ID | The user identifier assigned by the project |
| SUBMISSION ID | The identifier of the created submission |
| Latest error code | The most recently occurred error code (— if none) |
| Start time | The session start time |
| Last event time | The time the last event was recorded |
| Expiration date | The expiration date for detail record retention |
Event timeline
Below the summary card is the event timeline, which lists all events that occurred in this session in chronological order. The total number of events (e.g.,총 44개 이벤트) is shown next to the section title.
- FE / BE filter chips — You can filter by source with the
FE 이벤트andBE 이벤트chips. - Each event’s composition — Made up of the recorded time, event name,
FE/BEbadge, metadata (key-value), and a더 보기toggle. - metadata — Additional information per event. For example:
projectId,pageUrl,method,durationMs,allPass,errorCode,statusCode,kycStatus,reason. Events without metadata are shown as에러데이터 없음.
Error cause tracing example
This is a typical flow for tracing the cause in a session whose status isERROR. (e.g., latest error code = processed_submission-approved)
Check the latest error code on the summary card
When you open a session whose status is
ERROR, the summary card’s latest error code shows processed_submission-approved. From the code’s form, you can guess the primary cause — it is an error related to an “already processed (approved) submission.”Find the result event in the timeline
In the timeline, find the result-received event
STEP2_RESULT. Its metadata records errorCode: processed_submission and statusCode: 400, indicating that the server did not process this submission normally and responded with 400.Confirm with the error page entry event
Next, the
ERROR_PAGE_VIEWED event is recorded with the path /error-page/processed_submission-approved. This means the user deviated from the normal flow and was forced out to the error page.