What are Webhooks?
Webhooks are a feature that allows you to receive real-time notifications when specific events occur. They automatically send alerts to a designated URL whenever KYC data changes or new information is added.1. Explore Webhook Event Types
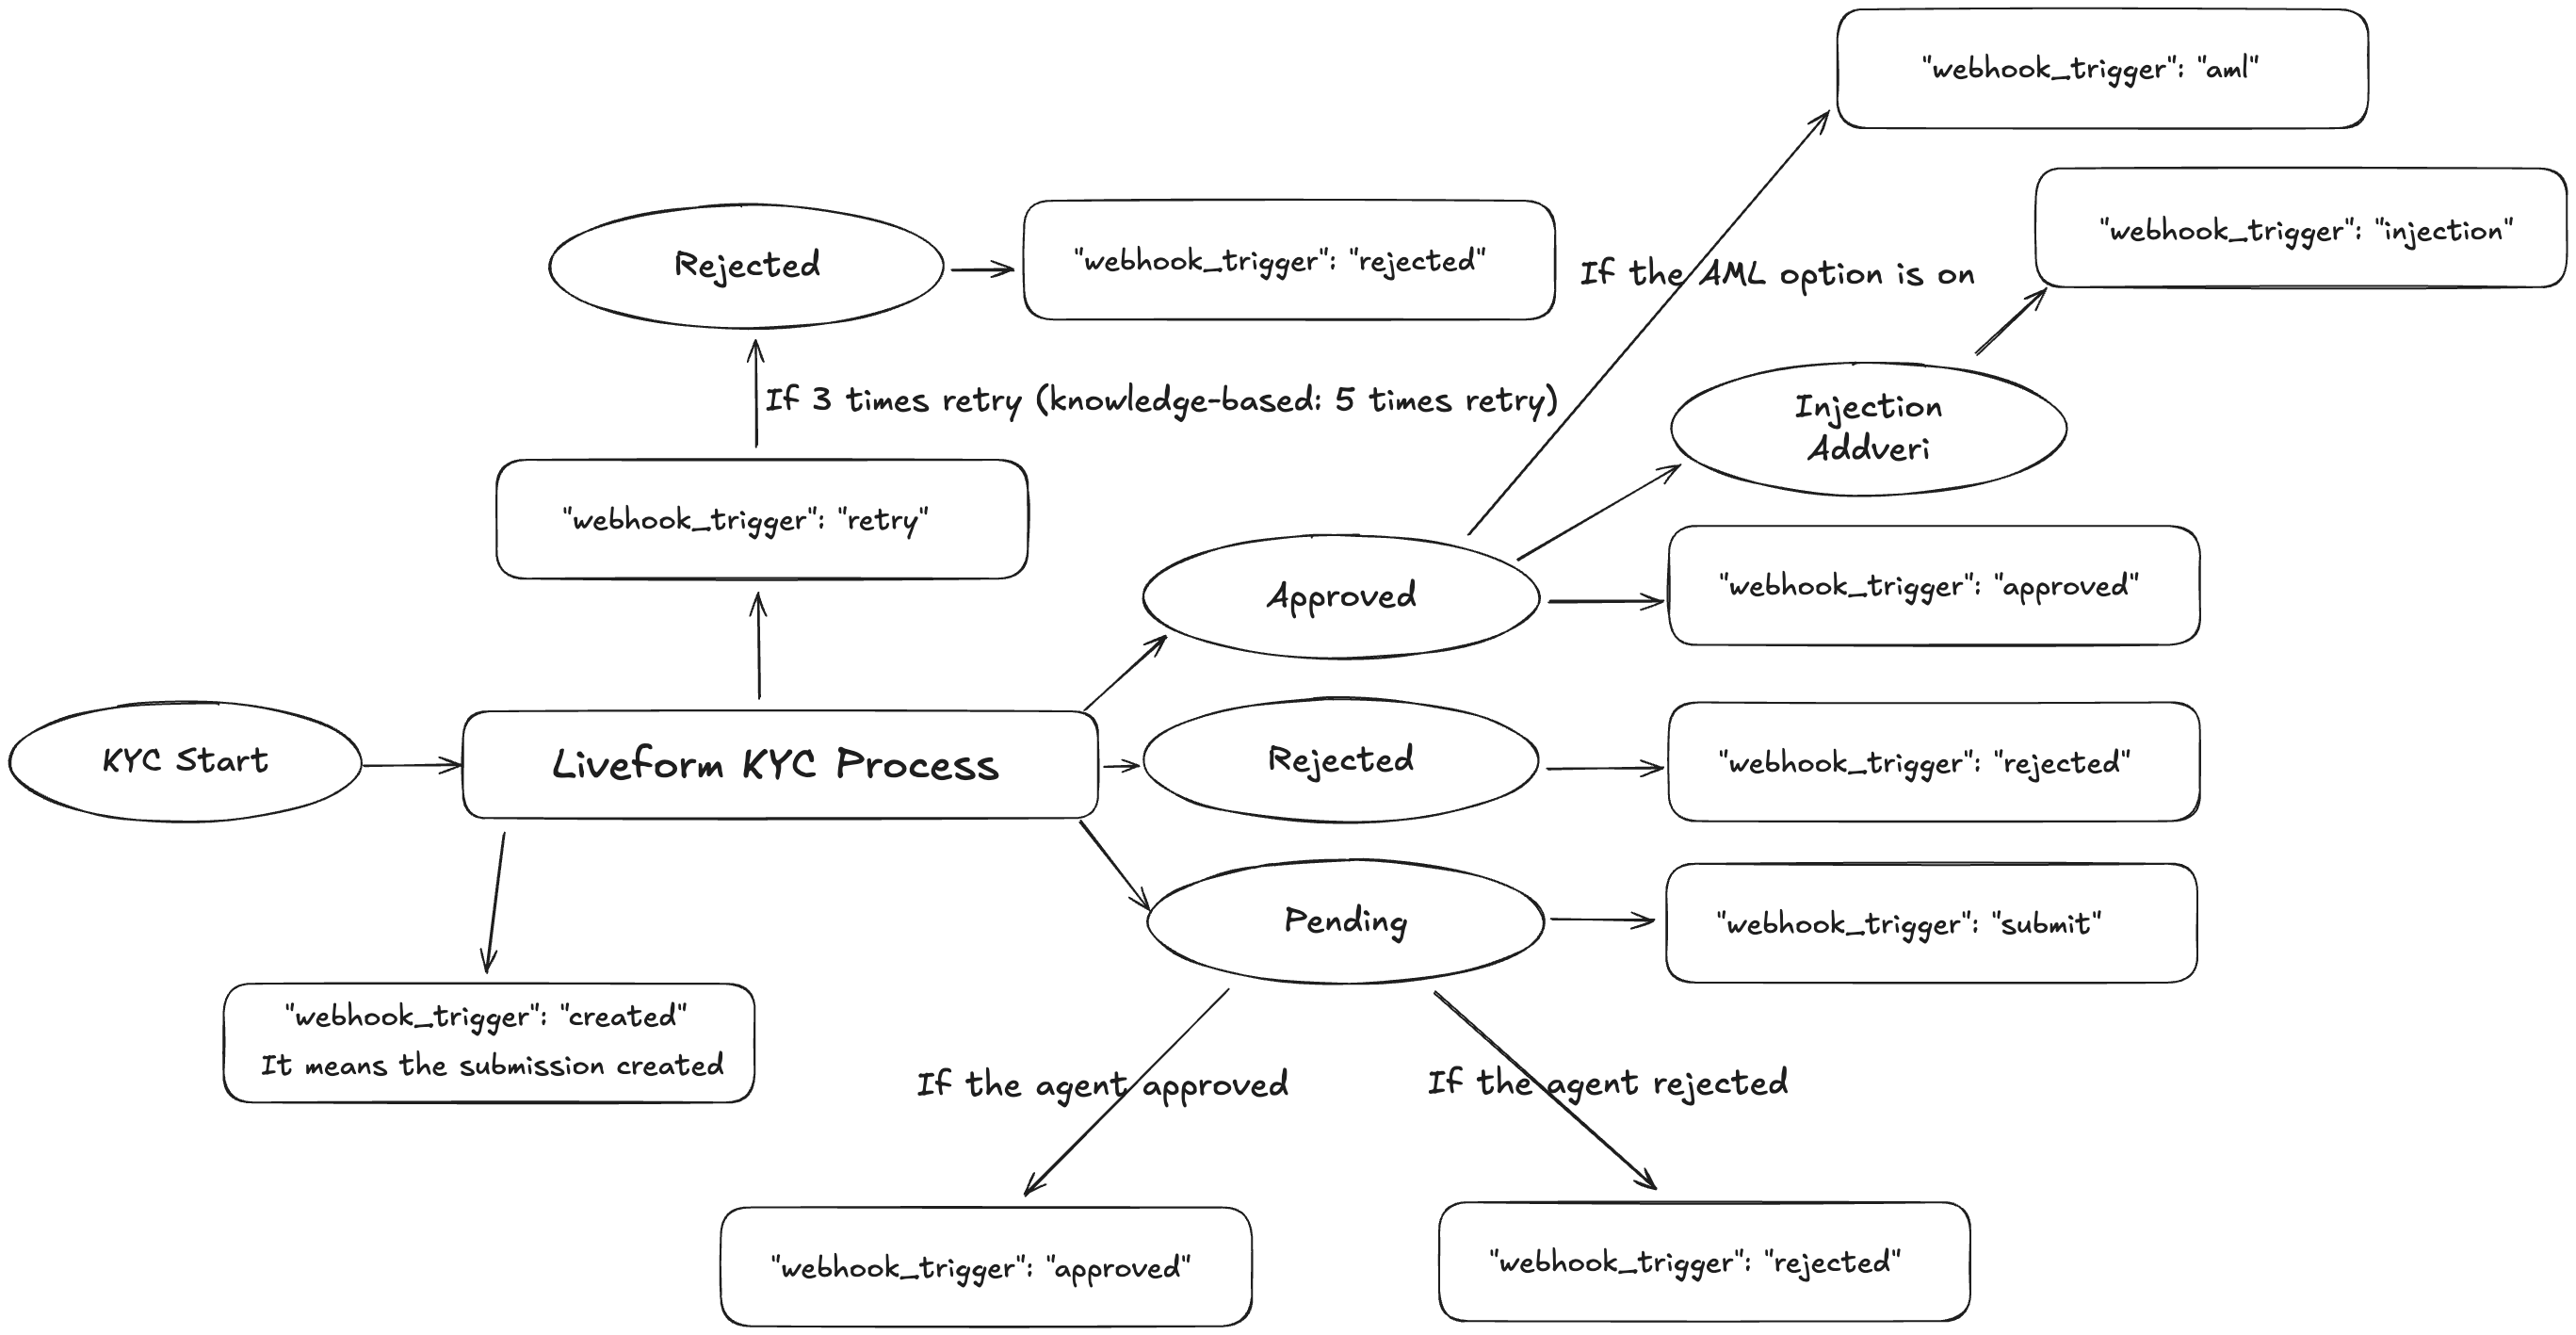
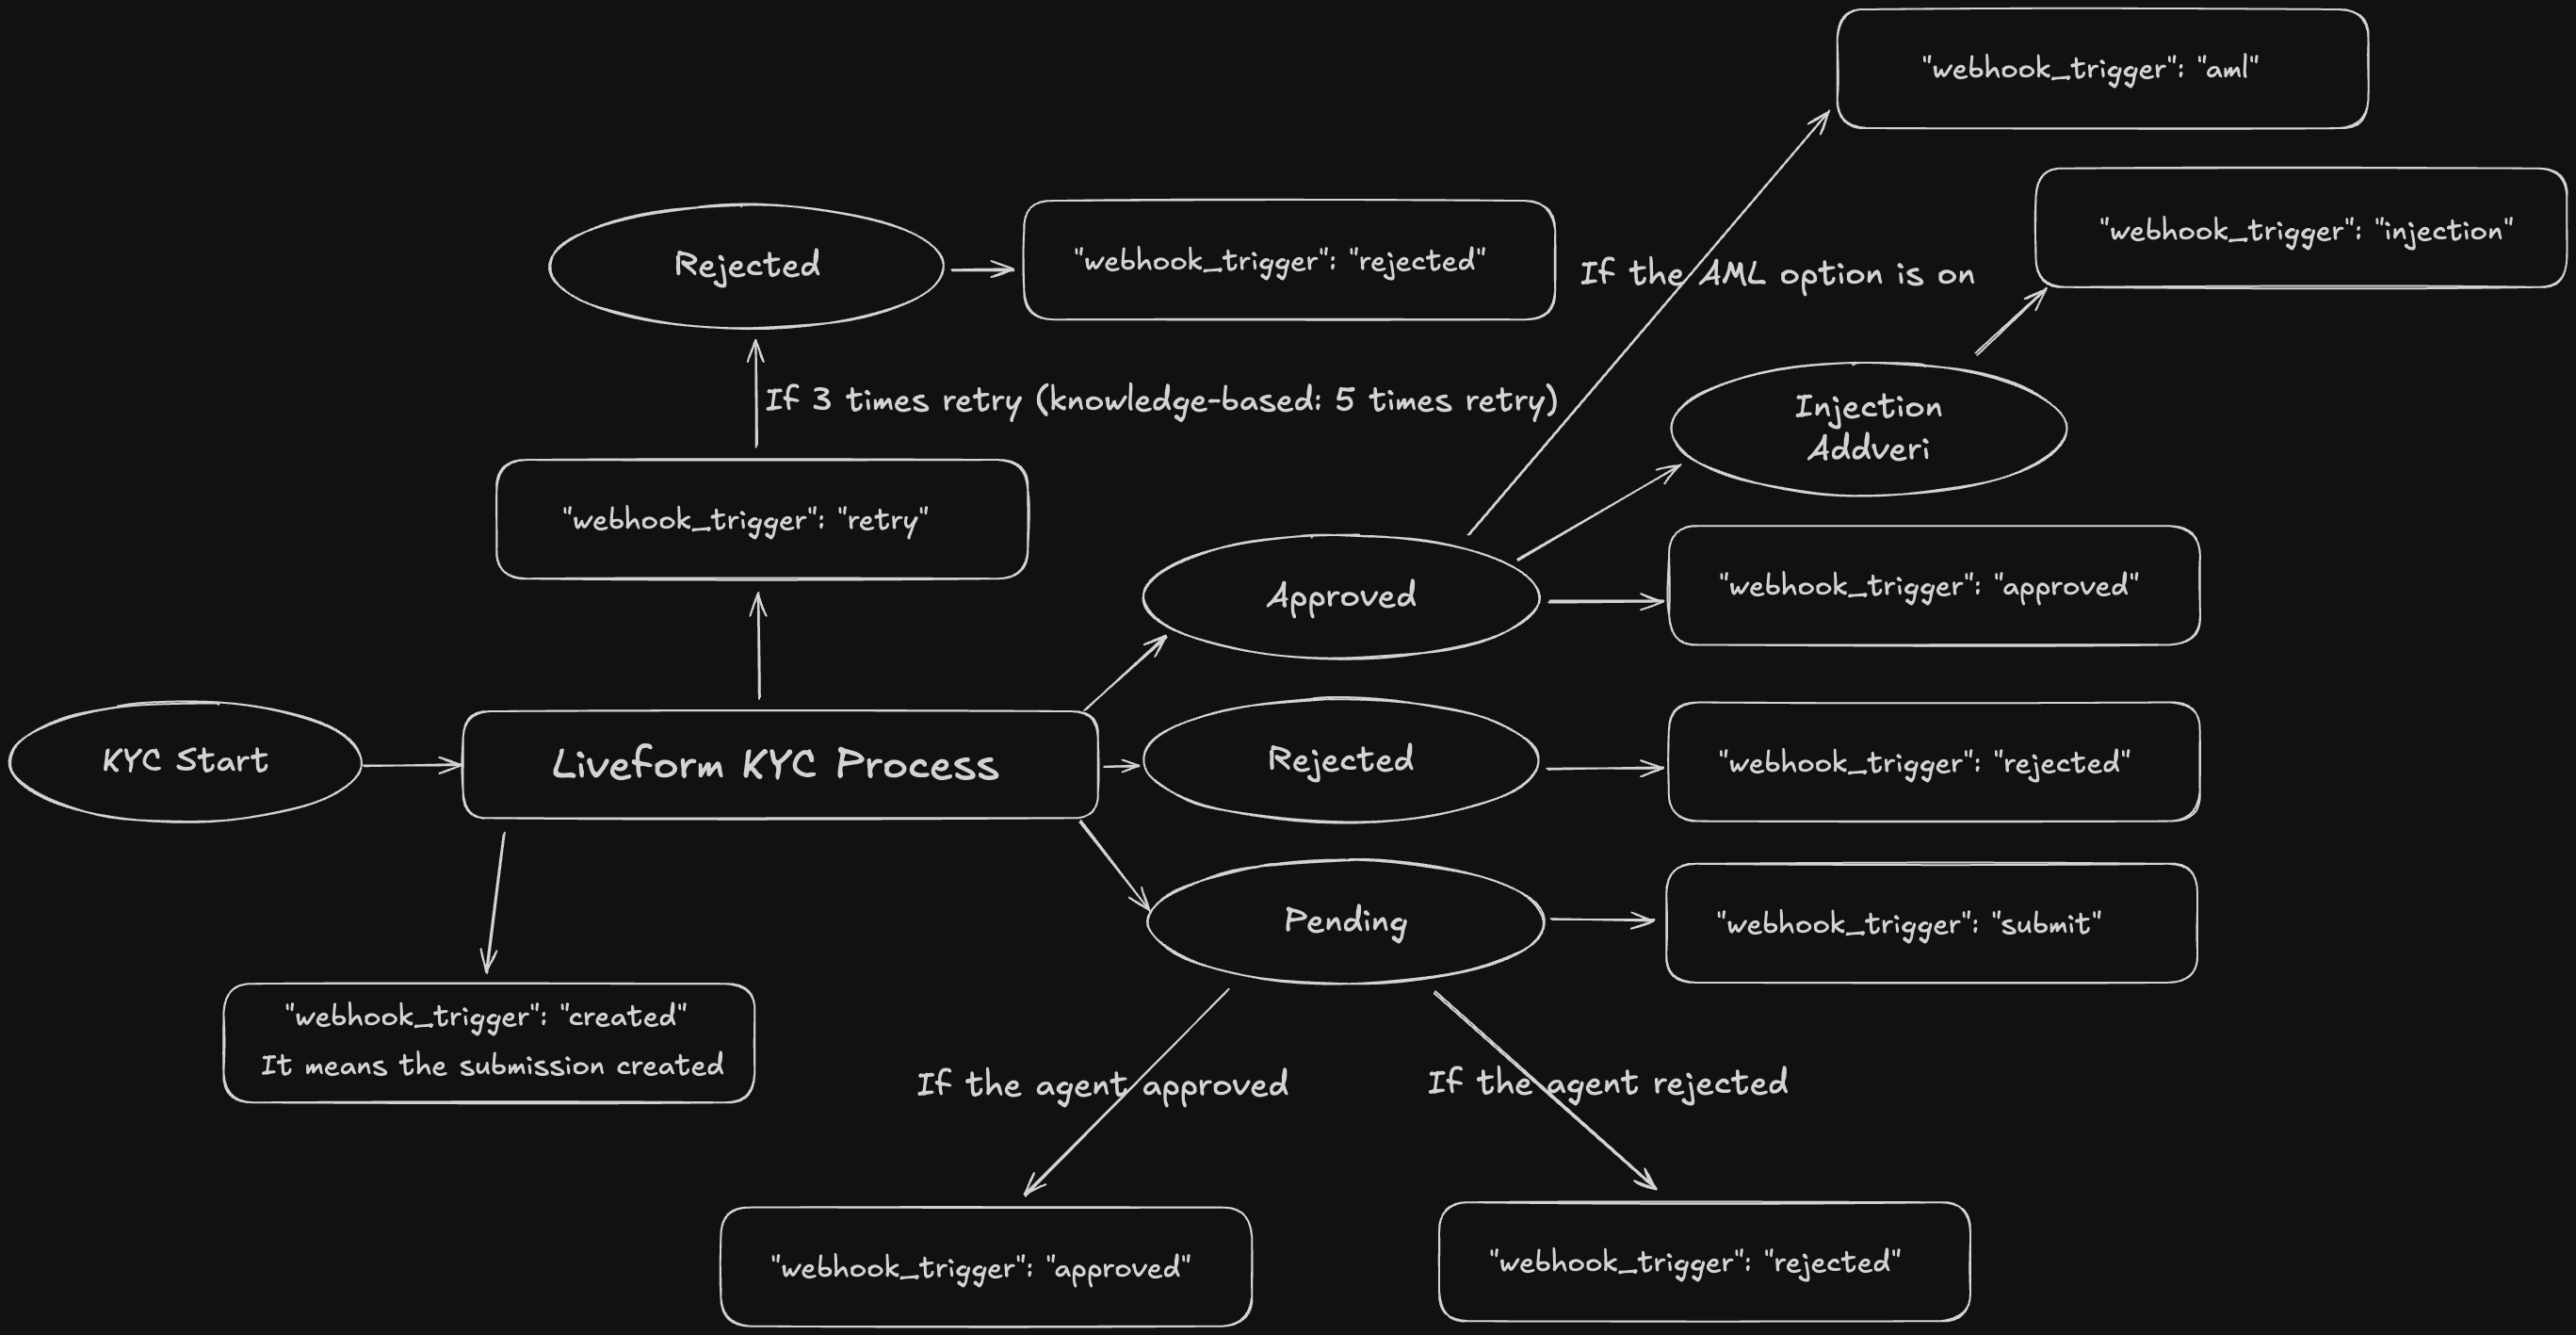
Receive real-time updates through ARGOS Identity webhooks.- “webhook_trigger”: “created” → When the submission is created
- “webhook_trigger”: “retry” → The submitter proceeded, and the retry occurred
- “webhook_trigger”: “approved” → The submission is approved
- “webhook_trigger”: “rejected” → The submission is rejected
- “webhook_trigger”: “submit” → The submission becames pending status.
- “webhook_trigger”: “updated” → The submission is updated
- “webhook_trigger”: “delete” → The submission delete proceed
- “webhook_trigger”: “token_expired” → The Token ID has expired
- “webhook_trigger”: “injection” → The injection proceed in the submission
- “webhook_trigger”: “aml” → The aml process proceed
- “webhook_trigger”: “aml_monitor” → The aml_monitor process proceed
Approved
Rejected
Updated
Delete
Submit
Token expired
Data injection
AML Search Result
AML Ongoing Monitoring Results
2. Register Webhook Events
Dashboard Login
Log in to the ID Check Dashboard.
Navigate to Access Management
Select
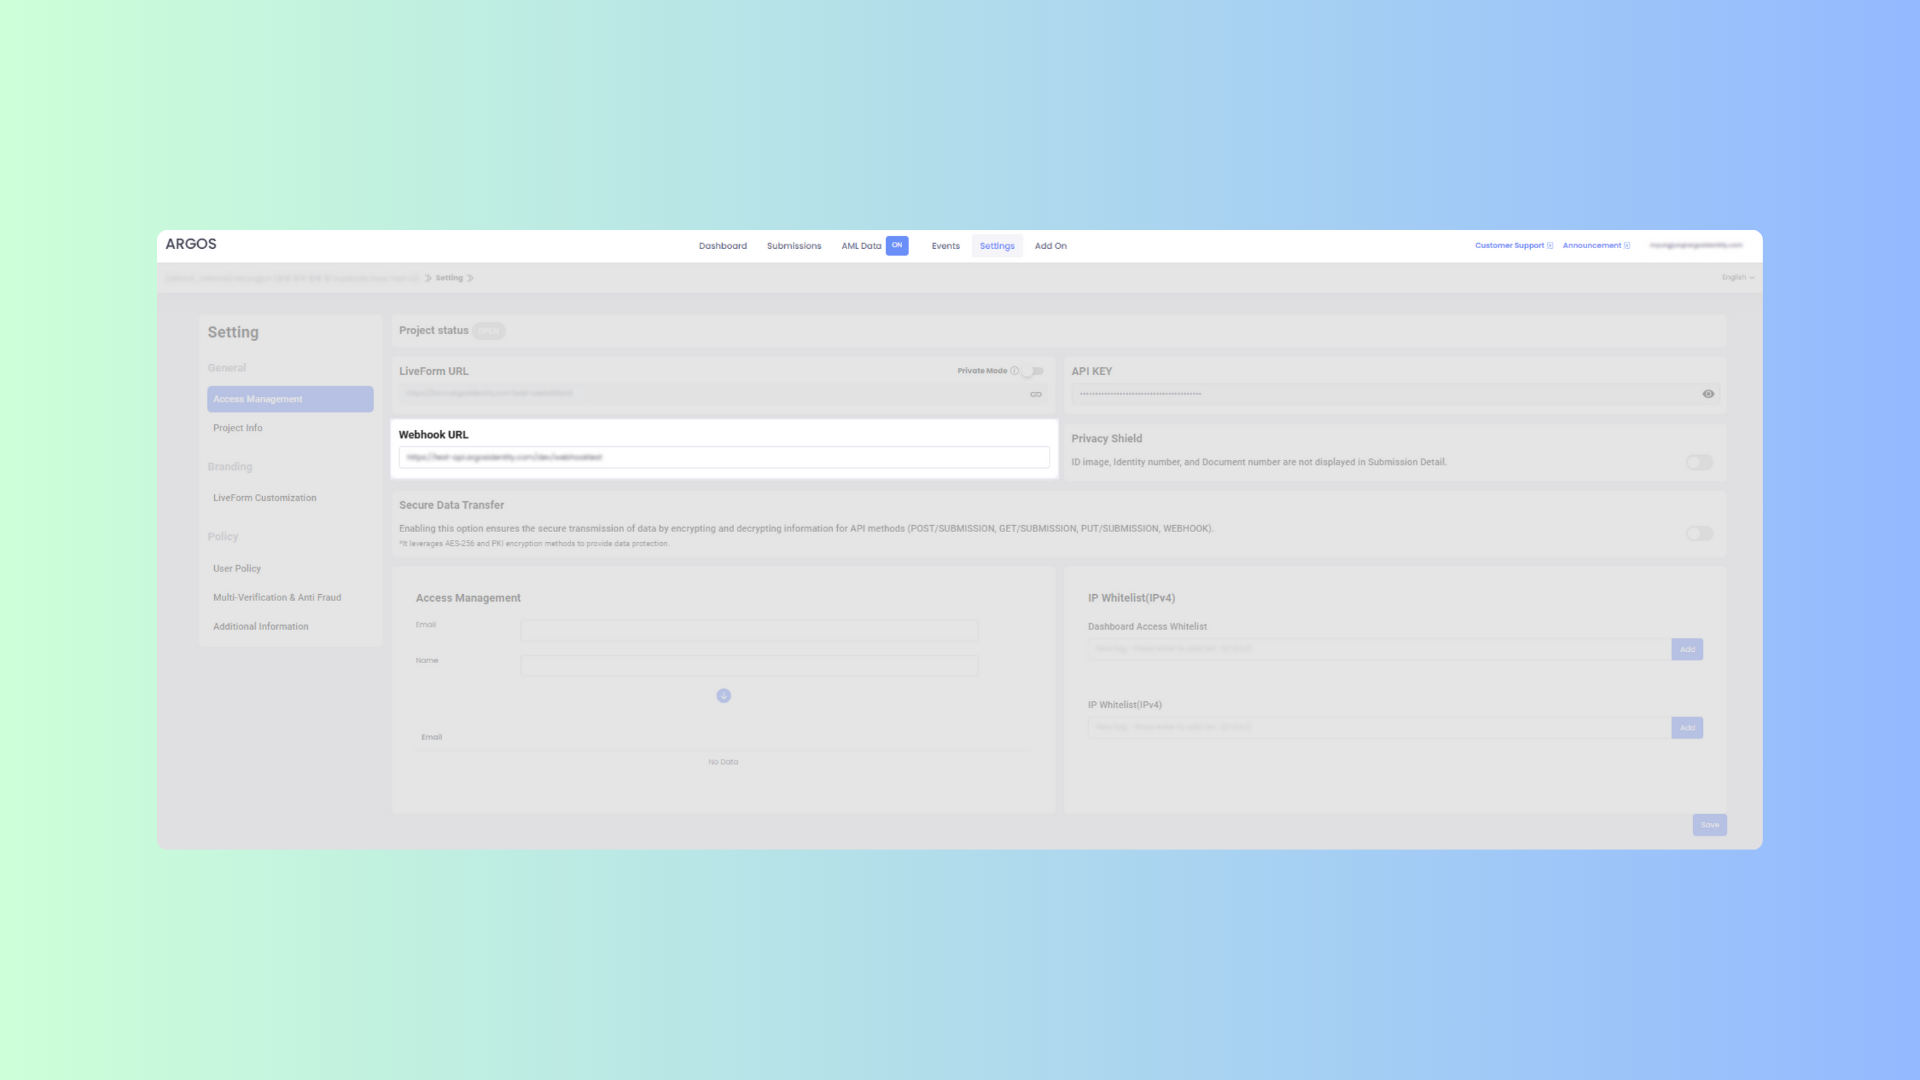
Access Management from the General section in the left sidebar.Enter Webhook URL
Find the
Webhook URL section and enter your desired webhook address in the input field. The URL must use the HTTPS protocol and be in a valid format.3. Activate Encryption Option for Secure Data Transfer
ARGOS Identity provides an encryption option to protect sensitive KYC data transmitted through webhooks. When this feature is activated, all webhook data is automatically encrypted, enabling more secure information exchange.a. What does encrypted webhook data look like?
Encrypted webhook responses are delivered in the following format:{ "data": "encrypted-string" }, where encrypted-string is the result of encrypting the original data.
data-encrpyted.json
b. Easily Set Up the Encryption Option
Dashboard Login
Log in to the ID Check Dashboard.
Navigate to Access Management
Select
Access Management from the General section in the left sidebar.