Representative Use Cases
Since identity can be re-verified with just one selfie without a password or authentication code, you can enhance security while reducing user friction.Device Change
Used by financial institutions as a re-authentication means to reduce account theft risk during device change·number change.
Re-authentication on Anomaly Detection
ATO Prevention - Apply access block/release policies with additional face authentication when high-risk login, overseas access, or bulk attempts are detected.
Regular Identity Re-verification
Periodic KYC Refresh - Used as a periodic same-person verification procedure in high-value services·regulated industries.
Password Loss/Information Change
Insert as identity verification step before important account changes such as password reset, payment method·contact change.
Operation Method (3-Step)
Process
Call Add-On URL (including pid + Submission ID) → Take selfie
When entering from desktop, QR is displayed → Continue shooting on mobile.
Benefits of FACE AUTH
| Benefit | Description |
|---|---|
| Fast Re-authentication | Complete with just one selfie without re-shooting ID |
| Security Enhancement | Protect accounts as an additional factor alongside password·OTP |
| Policy Flexibility | Detailed settings by situation such as face match threshold, liveness, occlusion blocking |
| Simple Integration | Operates as an add-on dependent on existing eKYC project, maintaining operational consistency |
Project Creation and Settings
To use FACE AUTH, first create an Add-On project in the dashboard and set policies (threshold·liveness·occlusion).Step 1: Create Add-On Project
Select Add-On menu → ‘Create Project’ in the dashboard to create a new FACE AUTH project. Dependency connection with eKYC project is formed immediately upon creation, and Add-On URL and API key are automatically mapped.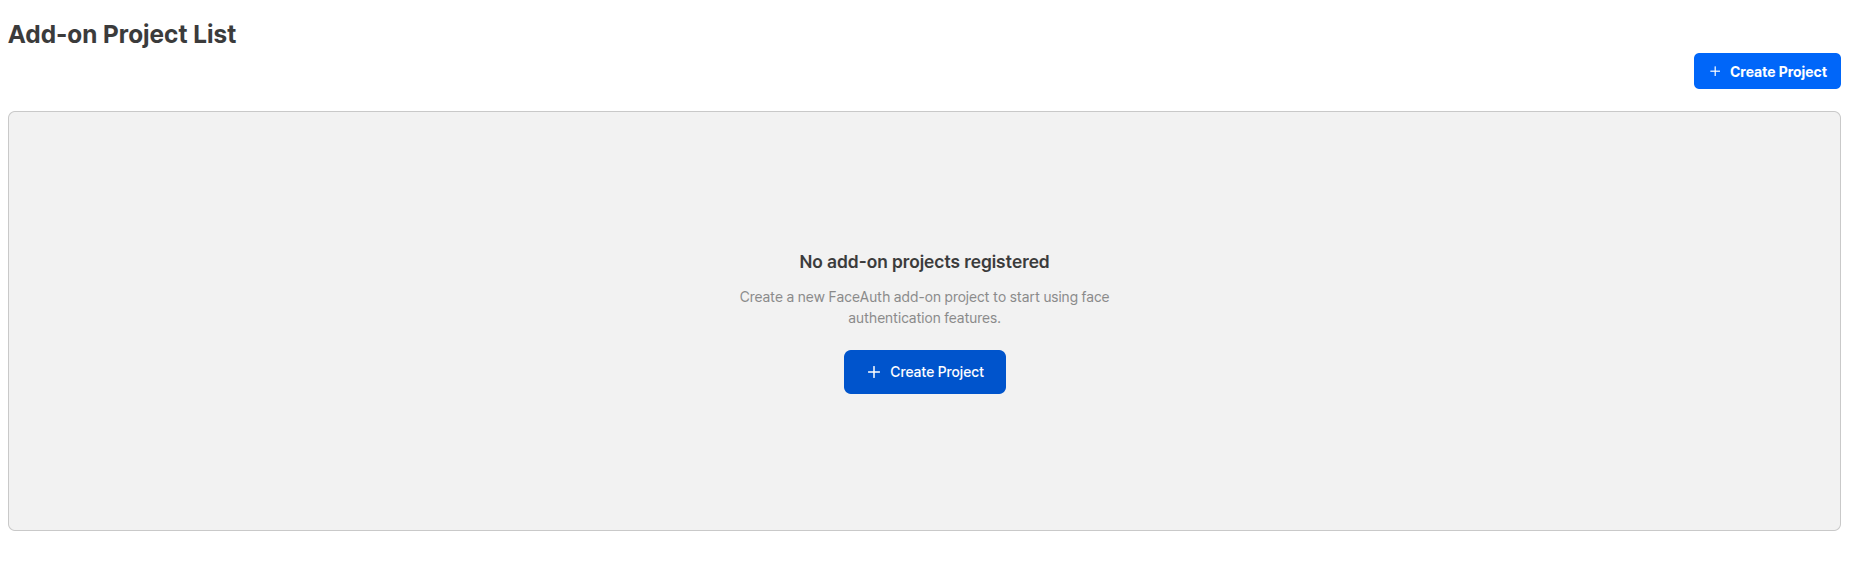

Step 2: Project Information Settings
Specify project name·logo in the settings screen, and set button/URL to move to after authentication submission completion.
| Setting Item | Description |
|---|---|
| Project Name | Displayed as title on authentication start screen |
| Project Status | Service (Normal Operation) / Closed (Authentication Disabled) |
| Add on Logo | Displayed at top of first authentication screen (ARGOS logo displayed if not set) |
| Return URL | URL where user is redirected after authentication completion |
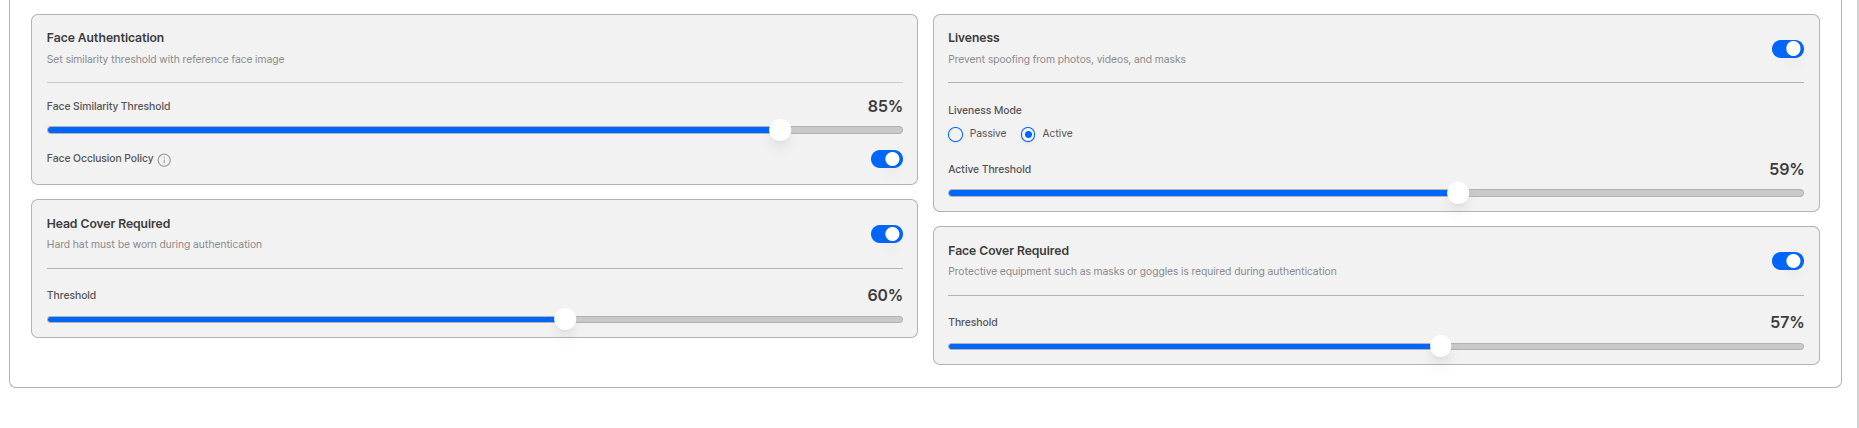
Step 3: Policy (Threshold) Settings
Thresholds are more lenient when lower, stricter when higher. Adjust step by step to match service risk·UX goals.
| Policy Item | Description | Recommended Value |
|---|---|---|
| Face Authentication Threshold | Criteria for judging if same person as eKYC approved user’s face | 98 points |
| Liveness | Determines if shot selfie is of an actual living person (Passive/Active) | 70 points |
| Face Occlusion | Checks if face is not occluded by other objects during authentication | - |
Face occlusion and face occlusion threshold cannot be used simultaneously.
- Head Occlusion Threshold: Environments requiring safety helmet (bike, construction site, etc.)
- Face Occlusion Threshold: Environments requiring mask (hospital, construction site, etc.)
Step 4: Add-On URL Parameters and Encryption Settings
Required parameters must be registered to use FACE AUTH URL. Required Parameters:| Parameter | Description |
|---|---|
pid | Add-On project ID (included in URL path/parameters) |
sid | eKYC Submission ID (Add-On authentication possible only in approved status, encryption required) |
Token Expiration Condition Settings
You can configure limited access control through Token ID.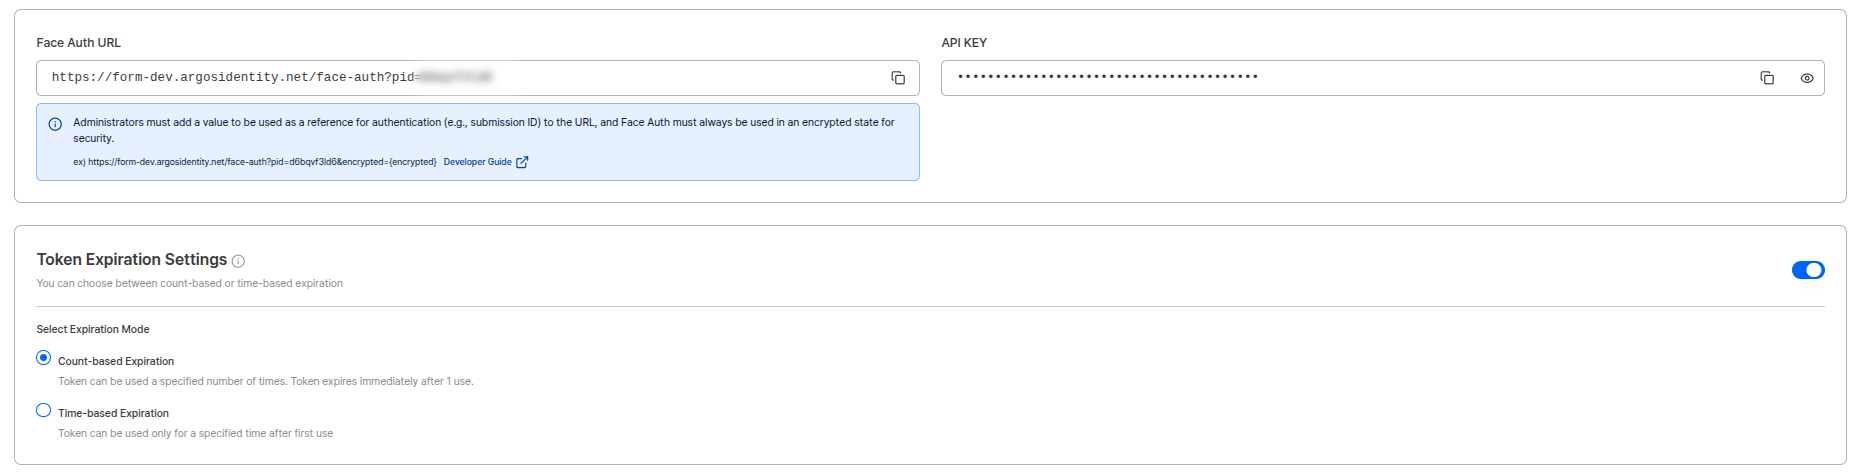
| Expiration Condition | Description |
|---|---|
| Usage-based Expiration | Expire the Token ID when token is used once |
| Time-based Expiration | Measure time from when token is used once and expire Token ID |
Expiration triggering condition is when “Start” button is clicked on the first FACE AUTH screen.
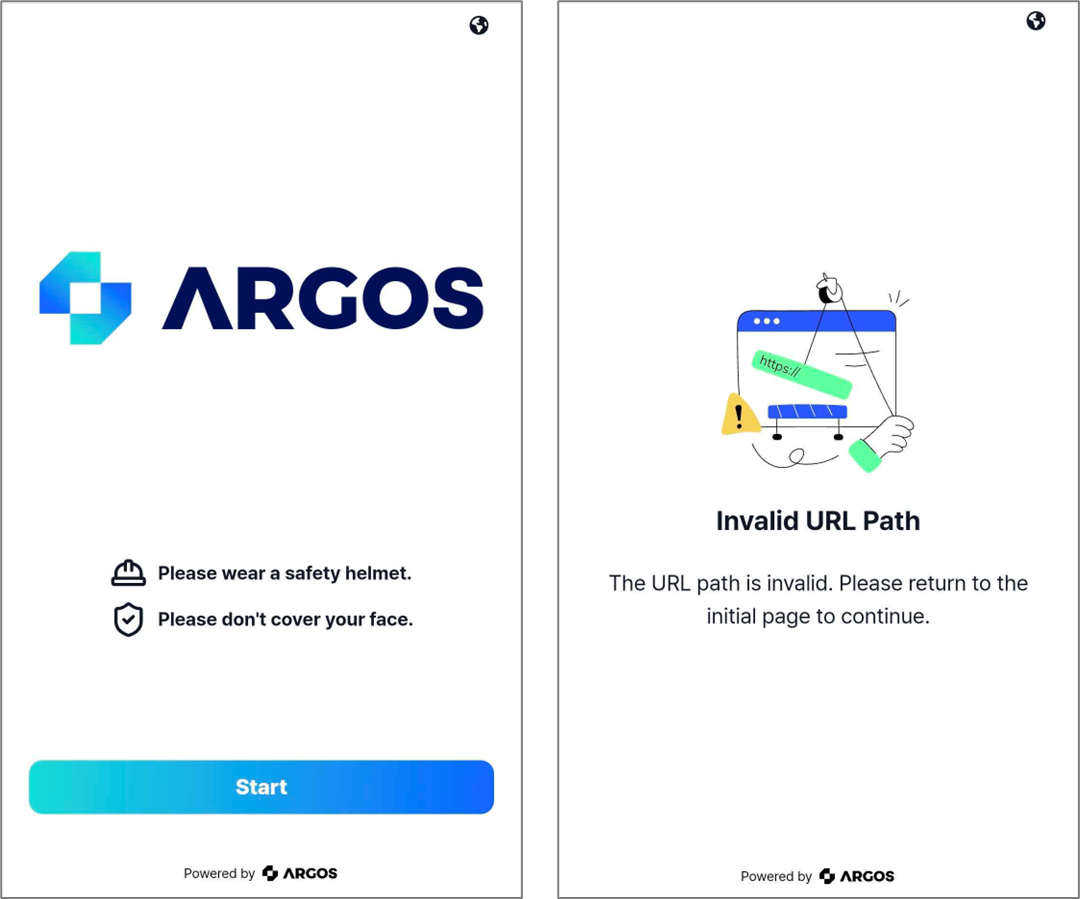
Providing to Users
FACE AUTH can be provided in two ways.- A. Add-On URL (Recommended)
- B. API-based Integration
Guide users to open the Add-On URL to proceed with re-authentication through selfie shooting on the web screen.Required Parameters:Desktop → Mobile Transition:
When opened on PC, QR code is displayed so users can scan with their phone and continue shooting.
pid={AddOn Project ID}— included in the URL query string in plaintextencrypted={...}— must containsid={Approved eKYC Submission ID}inside, AES-256 encrypted (see Step 4)
URL pattern
Checklist
- ✅ Connect Add-On URL to link/button
- ✅ Verify
sidis not missing and refers to anapprovedeKYC submission - ✅ Security-sensitive parameters such as
sidmust be embedded insideencrypted— never exposed in plaintext - ✅ If desktop traffic is high, place QR transition guide text at top fixed position
Operation Verification (Smoke Test)
- Whether authentication screen appears when Add-On URL is called with approved submissionId
- Whether QR display and mobile transition are natural when entering from PC
- Whether results are stored·queried as Add-On submission (Auth ID) after shooting
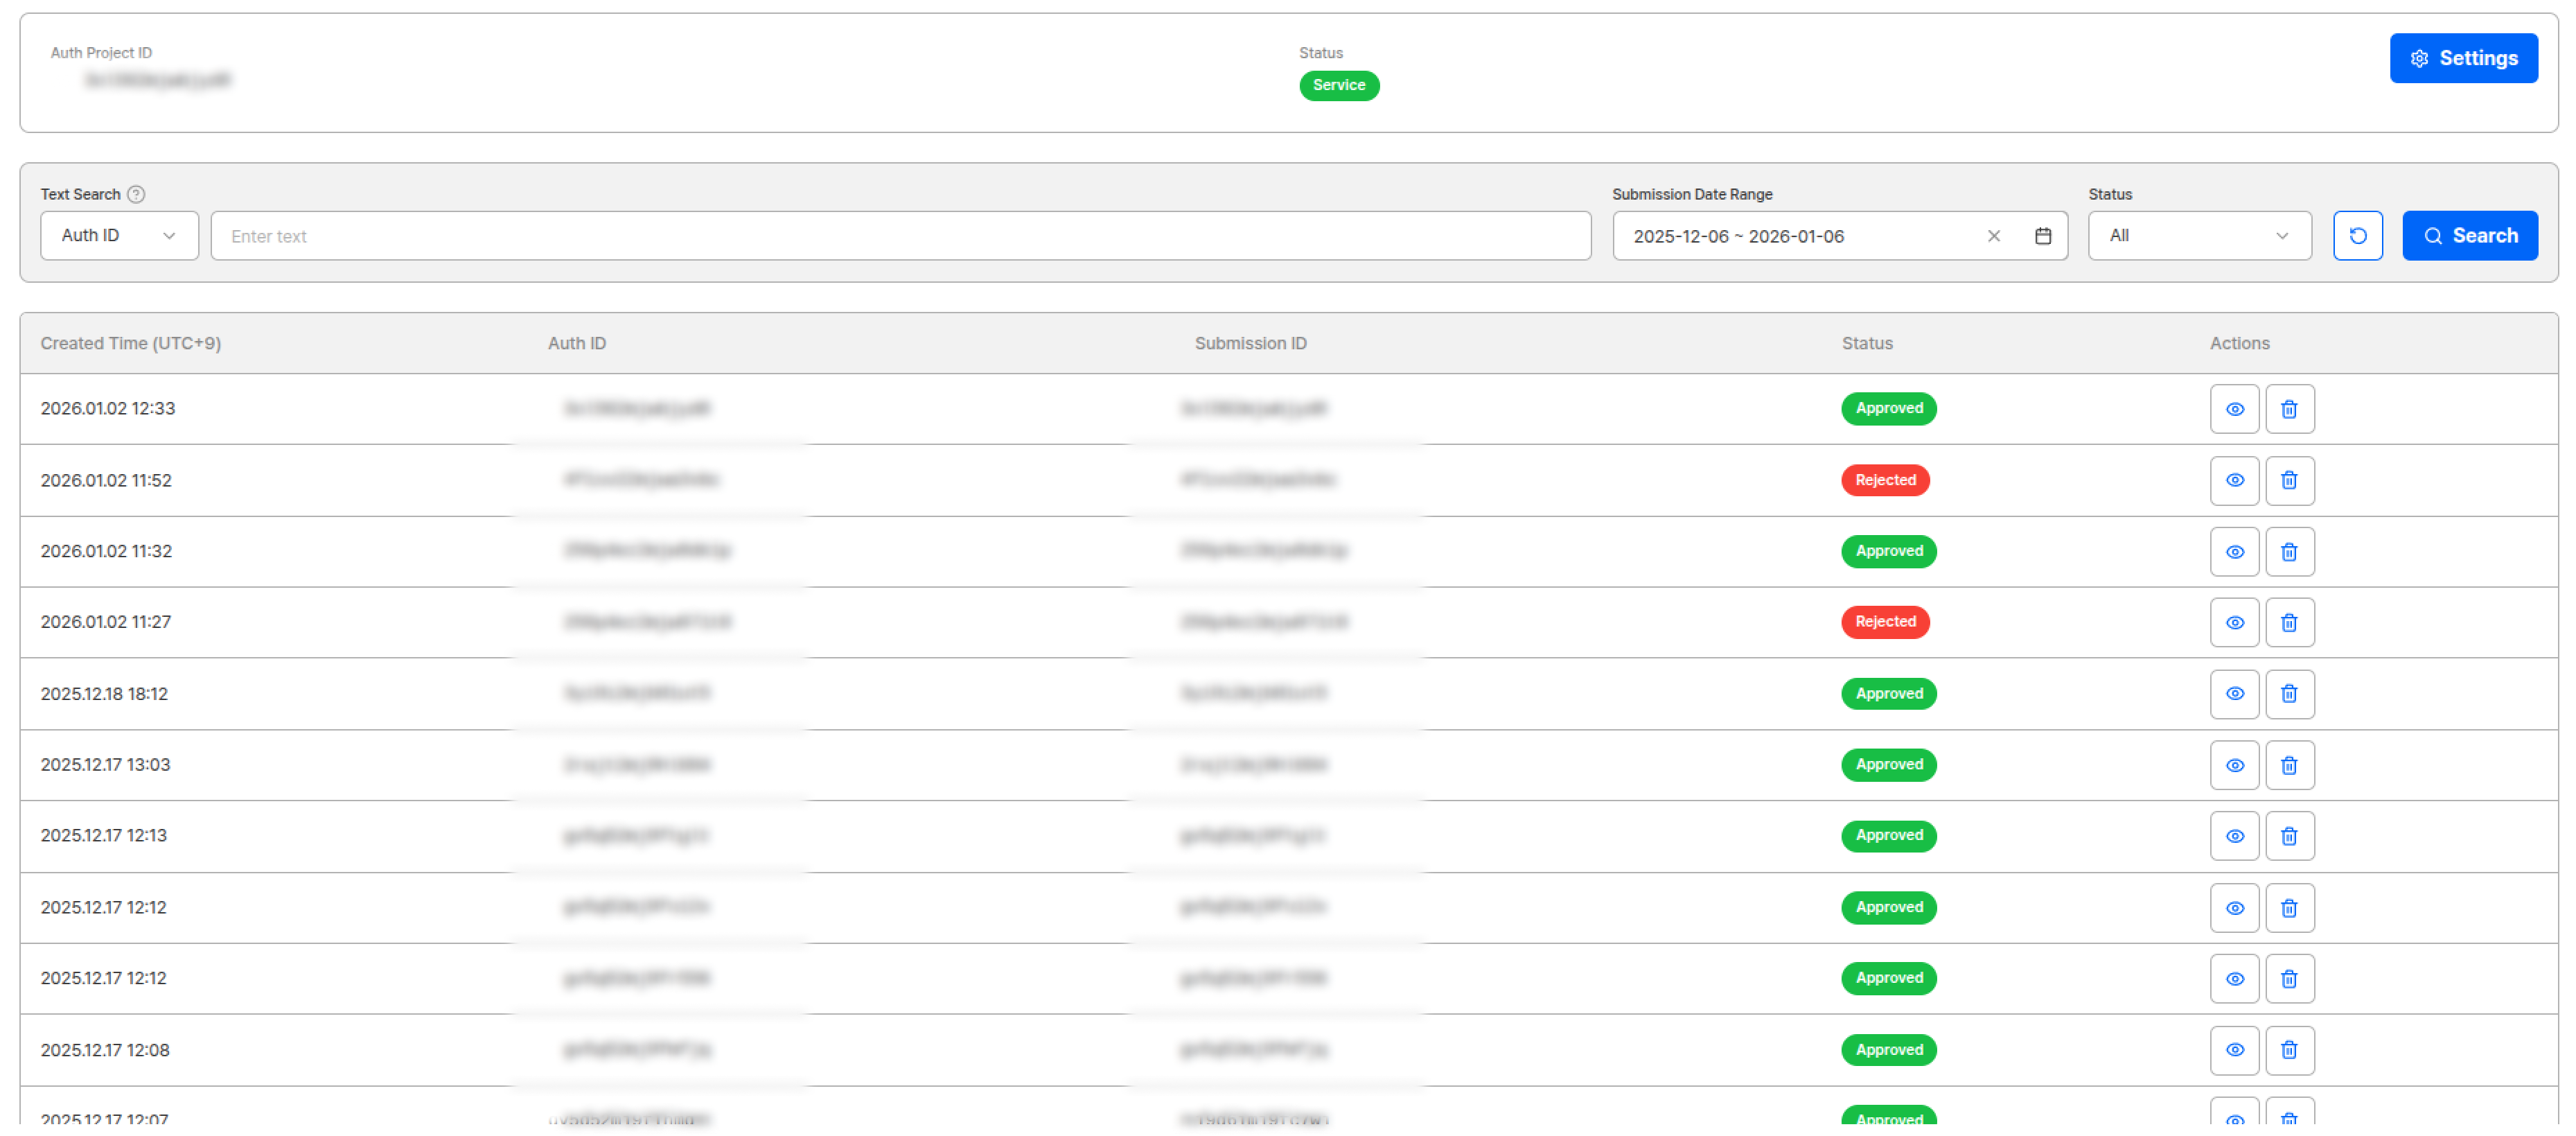
AUTH ID - Authentication Result Verification
Auth ID refers to one result (submission) of FACE AUTH (add-on). Same-person judgment comparing registered copy (face approved from eKYC previously) with this selfie (verified copy), applied policy snapshot, and processing timeline are recorded together.View Results in Dashboard
- Time
- AUTH ID (TARGET)
- Submission ID (Reference)
- Status
- Policy snapshot
- Score/threshold
- Liveness·occlusion results
- Comparison images
- Logs
Auth ID Detail Information
| Field | Description |
|---|---|
| Authentication ID | Unique identifier for the submission |
| Submission ID | Previously approved submission referenced as comparison target during submission |
| Status | Displays authentication result as Approved, Rejected |
| Policy | Project options applied when the submission was processed |
| FACE Similarity | Similarity between selfie images measured during authentication |
| Liveness | Liveness score of submitted selfie |
| Face Occluded | Result judging if face is occluded as Pass / Fail |
Reference information prioritizes Selfie comparison, and if Selfie is not available, calls ID portrait as secondary for comparison.

Real-time Integration via Webhook
When FACE AUTH is completed and final results are available, results are automatically sent to the Webhook URL registered in the existing ID Check project. Trigger type:"faceAuth"
Implementation Checklist
- ✅ Register Webhook URL (project unit) and confirm receipt with 2xx response
- ✅ Duplicate receipt prevention: Check duplicates based on Authentication_id
- ✅ Timezone processing: Create_Time(UTC+0) → Convert to internal standard time if needed
- ✅ Key mapping: Map to internal users/requests with Submission_id, User_id, cf1~3
- ✅ Audit logging: Store original payload and routing results together
Checklist for Quick Adoption
Operation Tips
Related Documentation
Add-On API Overview
View complete overview of Add-On service.
POST/Face Auth API
Learn how to integrate FACE AUTH via API.
FACE AUTH Webhook
Learn how to receive FACE AUTH results via webhook.
Encryption Guide
Learn URL encryption methods.