How FaceAuth Is Delivered — Two Options
FaceAuth can be delivered in two ways. We recommend the Face Auth URL method, which removes the need to build your own camera UI and supports Active Liveness.A. Face Auth URL (Recommended)
Selfie capture happens on an ARGOS-hosted page (similar to Liveform). No client-side camera implementation is required, and the project policy can enable Liveness (Passive/Active) and occlusion (mask/helmet) controls.
B. POST /faceauth API
Your app implements the camera UI and posts the captured
faceImage file to the API. Active Liveness is not supported — only face similarity is compared.QueryString for Accessing FaceAuth
FaceAuth is a sub-project of ID check, and administrators can create as many projects as they want. To deliver additional authentication via the FaceAuth URL method, use the Face Auth URL within the Add-on project.To reference a submission_Id that has been approved through ID document or Knowledge-based where a selfie image exists, it must be added to the URL through QueryString, and for security purposes, it must always be used in an encrypted state.
Encryption must use the API key within the FaceAuth project and uses AES-256.
For detailed methods, please refer to Query String Encryption in the Data Encryption and Decryption page.
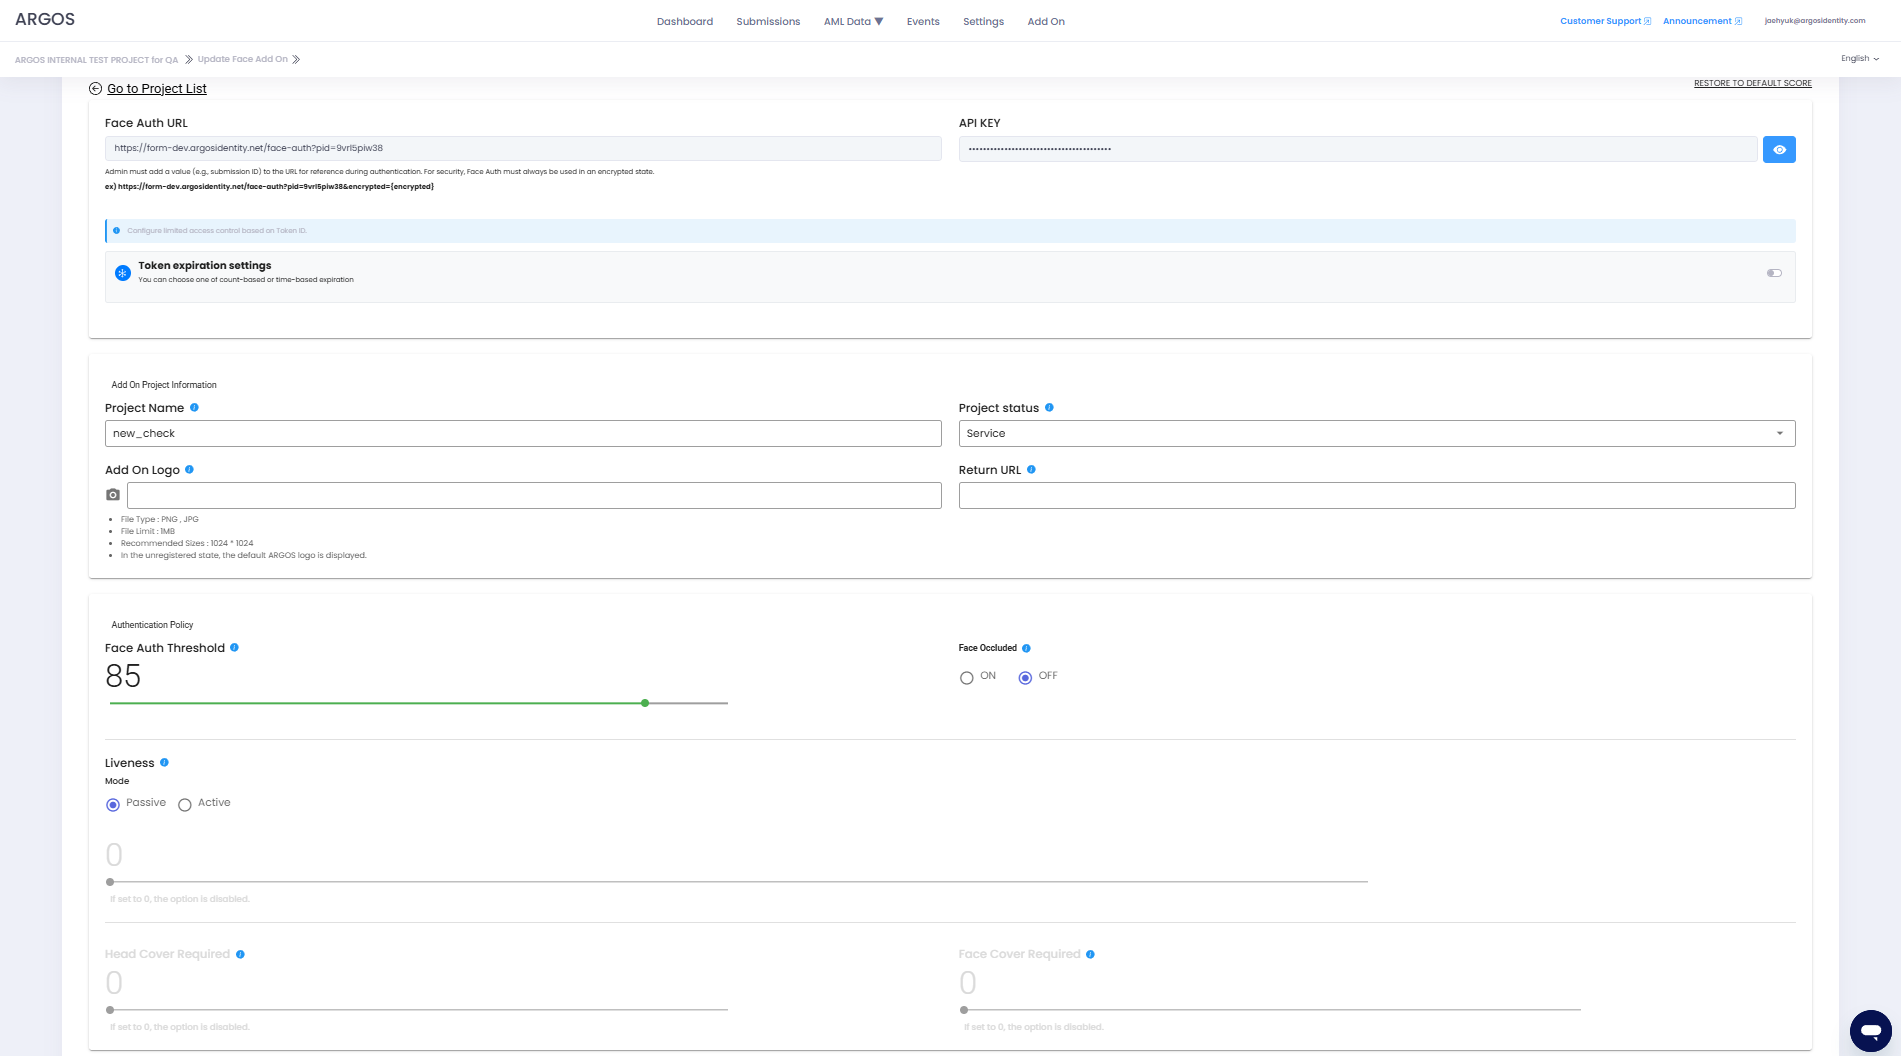
Face Auth URL
Face Auth QueryString basic: Only add the submission_Id to reference
Face Auth QueryString with all parameters: sid, authUserId, authCf1, authCf2, authCf3, token
When encrypted
Definition of Request Parameters
Unique number assigned to the project when creating a FaceAuth project (automatically attached to the URL)
submission_Id approved through ID document or Knowledge-based (sid is used for distinction)
User Id that the administrator will assign to the user (this could be the user Id in the administrator’s service or the same userId used in ID document or Knowledge-based)
Additional information that the administrator will assign to the user (e.g., email address, etc.)
Additional information that the administrator will assign to the user (same as authCf1)
Additional information that the administrator will assign to the user (same as authCf1)
Token that the administrator will add to the URL for security purposes.
Note!: This token operates separately from the pre-registered token in private mode.
Note!: This token operates separately from the pre-registered token in private mode.
How FaceAuth token works
How FaceAuth token works
The token is designed to assign a unique URL to each user when they authenticate through FaceAuth.
To apply a token, you must enable the token expiration condition setting option in the FaceAuth project, and it works as follows:
For example, you can specify an arbitrary tokenId set by the administrator in the token, and even if you reuse the token used in the main project, it works because it is viewed separately. For a guide on enabling the token expiration condition setting option in the FaceAuth project, please refer to FACE AUTH guide — Token Expiration Condition Settings.
To apply a token, you must enable the token expiration condition setting option in the FaceAuth project, and it works as follows:
- Count-based expiration: When the token is used once, the Token ID is immediately expired.
- Time-based expiration: When the time has elapsed from the point when the token was used once, the Token ID is expired.
For example, you can specify an arbitrary tokenId set by the administrator in the token, and even if you reuse the token used in the main project, it works because it is viewed separately. For a guide on enabling the token expiration condition setting option in the FaceAuth project, please refer to FACE AUTH guide — Token Expiration Condition Settings.
For approved cases where no selfie image exists, the portrait image from the ID document will be used instead.
Add-on API Endpoints
POST/FaceAuth
FaceAuth Submission
GET/FaceAuth
FaceAuth Retrieval
GET/FaceAuth/Image
FaceAuth Image Retrieval
DELETE/FaceAuth
FaceAuth Deletion
Webhook
Faceauth
FaceAuth Webhook
API Key
The Add-on API key serves to verify and authenticate client and server requests and is different from the project’s API key. It verifies the requester’s authentication information, and Argos Identity provides the appropriate response according to the request.How to Check Add-on API Key
Dashboard Login
Log in to the ID Check dashboard.
HTTP Response Status Codes
HTTP response codes indicate the status of requests. Each response code follows these rules:2xxSuccessful requests4xxClient errors5xxServer errors
| HTTP Status Code | Message | Description |
|---|---|---|
200 | OK | The request was successfully processed. |
400 | Invalid Query String parameters | The request could not be processed. Required parameters are missing or parameter format is incorrect. Please check the request parameters again. |
403 | User is not authorized to access this resource with an explicit deny | Access denied. The request was made from an IP that is not whitelisted. |
403 | Forbidden | Access denied. An incorrect API key may have been used. |
413 | Request Entity Too Large | The request is too large. The request contains data that exceeds the size that the server can process. Please reduce the request data and try again. |
500 | Internal Server Error | A server error occurred. There may be an issue with the Argos server. Please contact the Argos team. |
502 | Bad Gateway | The server received an invalid response from the upstream server. Please try again later or contact the Argos team. |