Use Cases
Brand-integrated KYC Service for Financial Institutions
Brand-integrated KYC Service for Financial Institutions
Banks can build a KYC process with their own logo and brand colors, and connect financial service terms and privacy policies to meet legal requirements. Email ownership verification prevents fake account creation, and automatic redirection to internet banking homepage can be set after completion.
Localized Onboarding for Global Platforms
Localized Onboarding for Global Platforms
Platforms providing international services can provide region-specific customized onboarding experiences by setting brand logos for each region and terms compliant with local regulations.
Fast Service Launch for Startups
Fast Service Launch for Startups
Startups launching new services quickly can implement professional KYC services with minimal configuration. Brand consistency can be maintained even by just setting project name and logo.
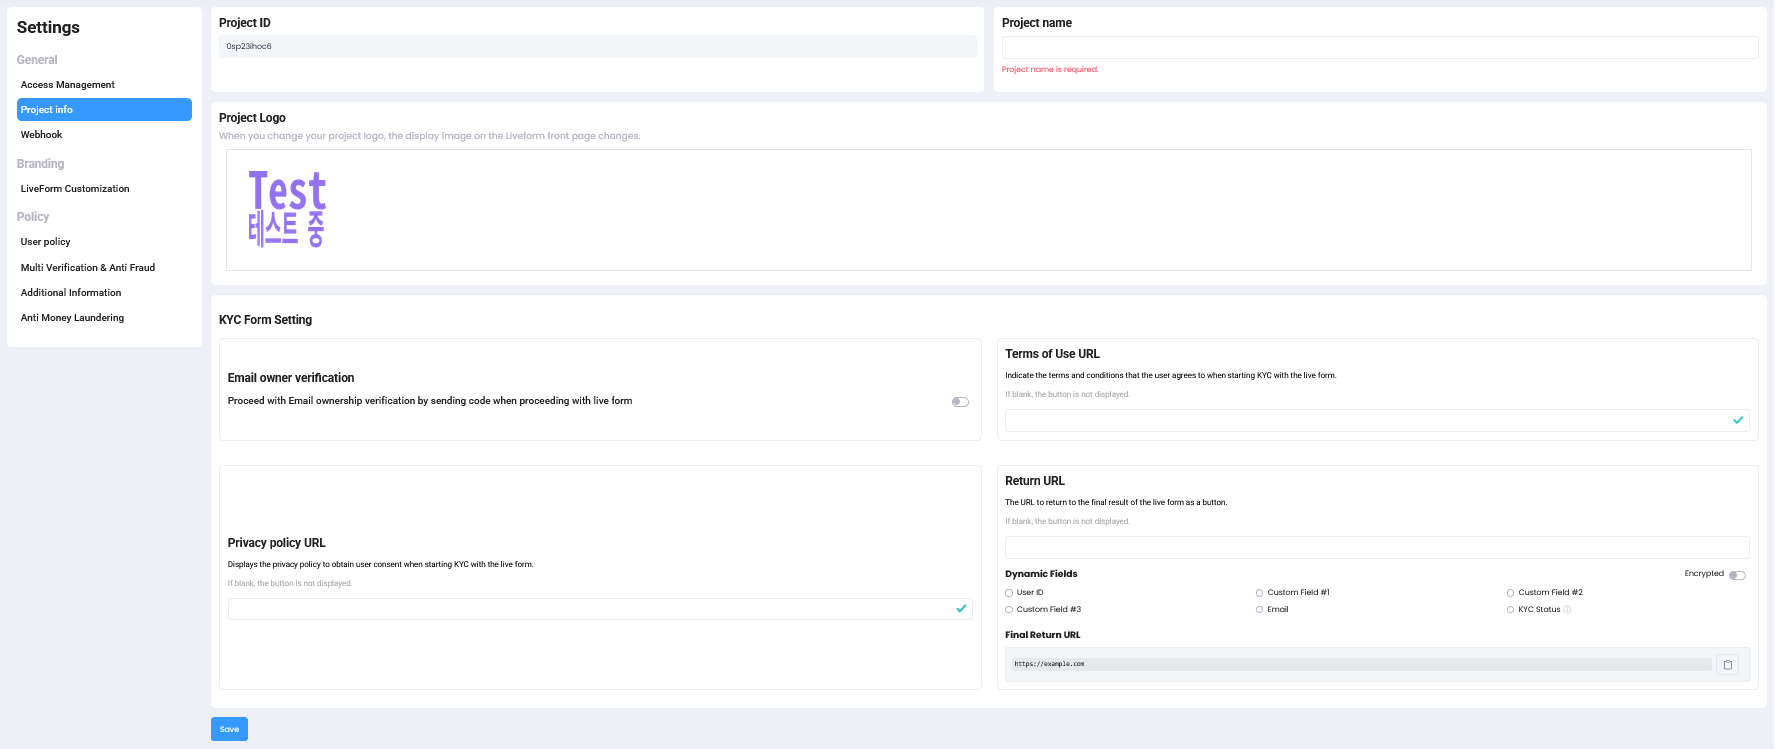
Project Information Settings Screen
Step 1: Configure Project Basic Information
Configure basic identification information for your ID check project.
| Setting | Description |
|---|---|
| Project ID | Unique ID to distinguish your projects. Providing this when contacting ARGOS customer support enables faster assistance. |
| Project Name | Displayed in email subject when using KYC email notification feature, so enter the exact service name that users will recognize. |
Project Name ImportanceWhen using KYC email notifications, it’s displayed in the email subject, so the service name must be clearly specified so users know which service is requesting identity verification.
Step 2: Configure Branding Elements
Configure branding elements to display in the user interface.| Item | Recommended Specifications |
|---|---|
| Recommended Image Size | 320x240, 640x480, 800x600, 1024x768 |
| Image Type | png, jpg, jpeg |
Step 3: Security and Authentication Options
Configure authentication options for additional security enhancement.Email Ownership Verification
Authenticate user-entered email at liveform start stage to block duplicate submissions through fake accounts at the initial stage.
Step 4: Legal Terms Connection Settings
Configure required terms consent process for service usage.Terms of Service URL
Connect your terms of service page to add a consent checkbox to the liveform start page.
Privacy Policy URL
Connect your privacy policy page to receive consent for personal information collection and use.
Step 5: User Flow Completion Settings
Configure settings to guide user’s next actions after KYC completion.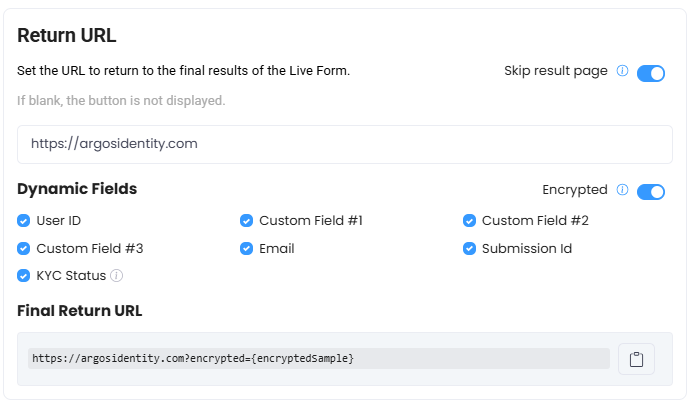
Return URL Settings
Return URL
Auto-redirects to specified URL after 3 seconds at KYC submission completion stage. Recommending your service homepage is suggested.Skip result page
Option to skip result page and go directly to Return URL. When flexible delivery of results directly to users through Return URL is needed, using Parameters supported by Dynamic Fields enables more efficient process delivery.Dynamic Fields
Receive important data needed for user page control along with Return URL.If Return URL is not specified, the result page is always displayed.
Return URL Guide
Check detailed Return URL configuration methods.
Step 6: Settings Verification and Testing
After completing project basic settings, you can verify settings as follows:1
Verify Logo and Branding
Check logo and branding element display through test liveform.
2
Validate Email Verification
Verify email verification process works correctly.
3
Check Terms Links
Check terms link connection status and consent process.
4
Verify Return URL
Check Return URL works correctly and user experience.
KYC Email NotificationsIf you want to use eKYC-related system notification email features through ARGOS, please request through your sales representative.
Benefits of Project Basic Settings
Brand Consistency
Provide identity verification experience maintaining brand consistency.
Legal Requirements Compliance
Meet legal requirements through terms consent process.
Enhanced Security
Block fake accounts and enhance security through email verification.
User-friendly
Design user-friendly post-completion flow.