> ## Documentation Index
> Fetch the complete documentation index at: https://developers.argosidentity.com/llms.txt
> Use this file to discover all available pages before exploring further.
# ChatGPT에서 MCP 연결하기
> ChatGPT에 ARGOS Identity 개발자 가이드 MCP 서버를 등록하고 활용하는 절차입니다.
## MCP 연결 개요
ARGOS Identity MCP 서버를 ChatGPT에 연결하면 Web과 데스크톱 환경 모두에서 최신 개발자 가이드를 즉시 조회할 수 있습니다. 아래 절차는 두 플랫폼을 모두 지원하며, 한 번 추가한 서버는 계정 전체에 적용됩니다.
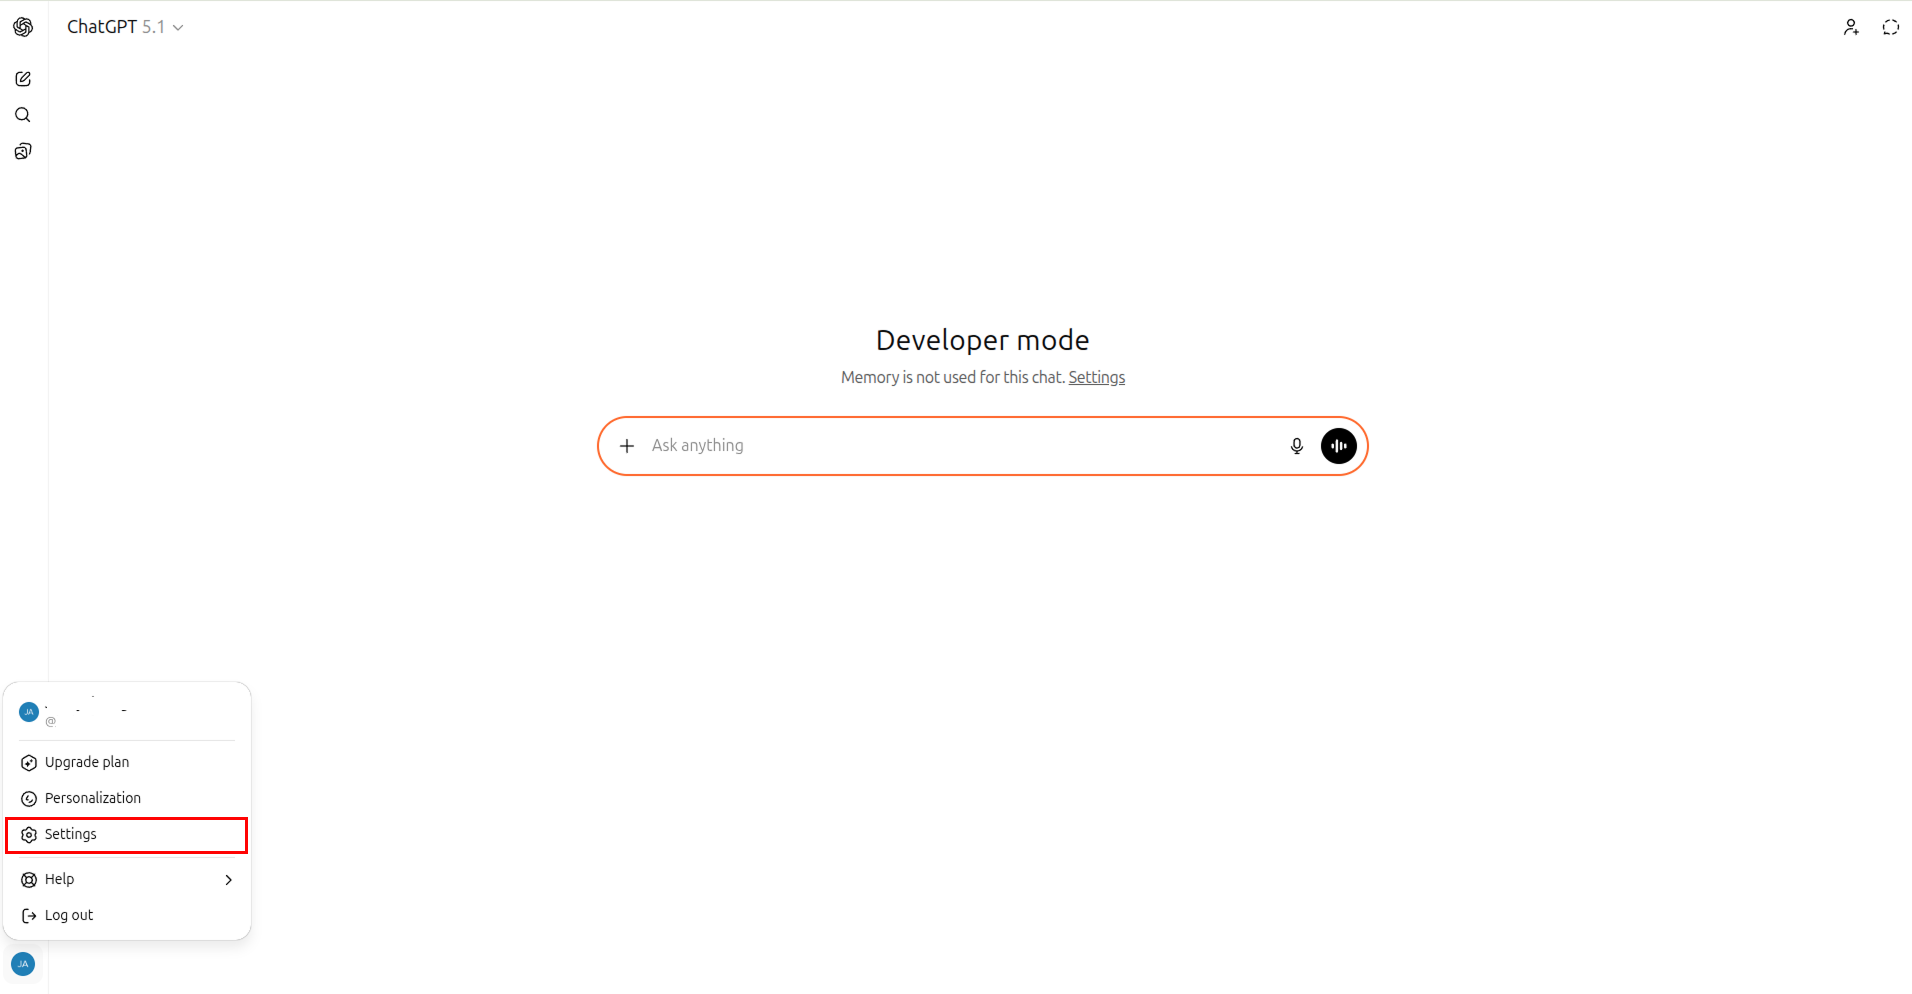
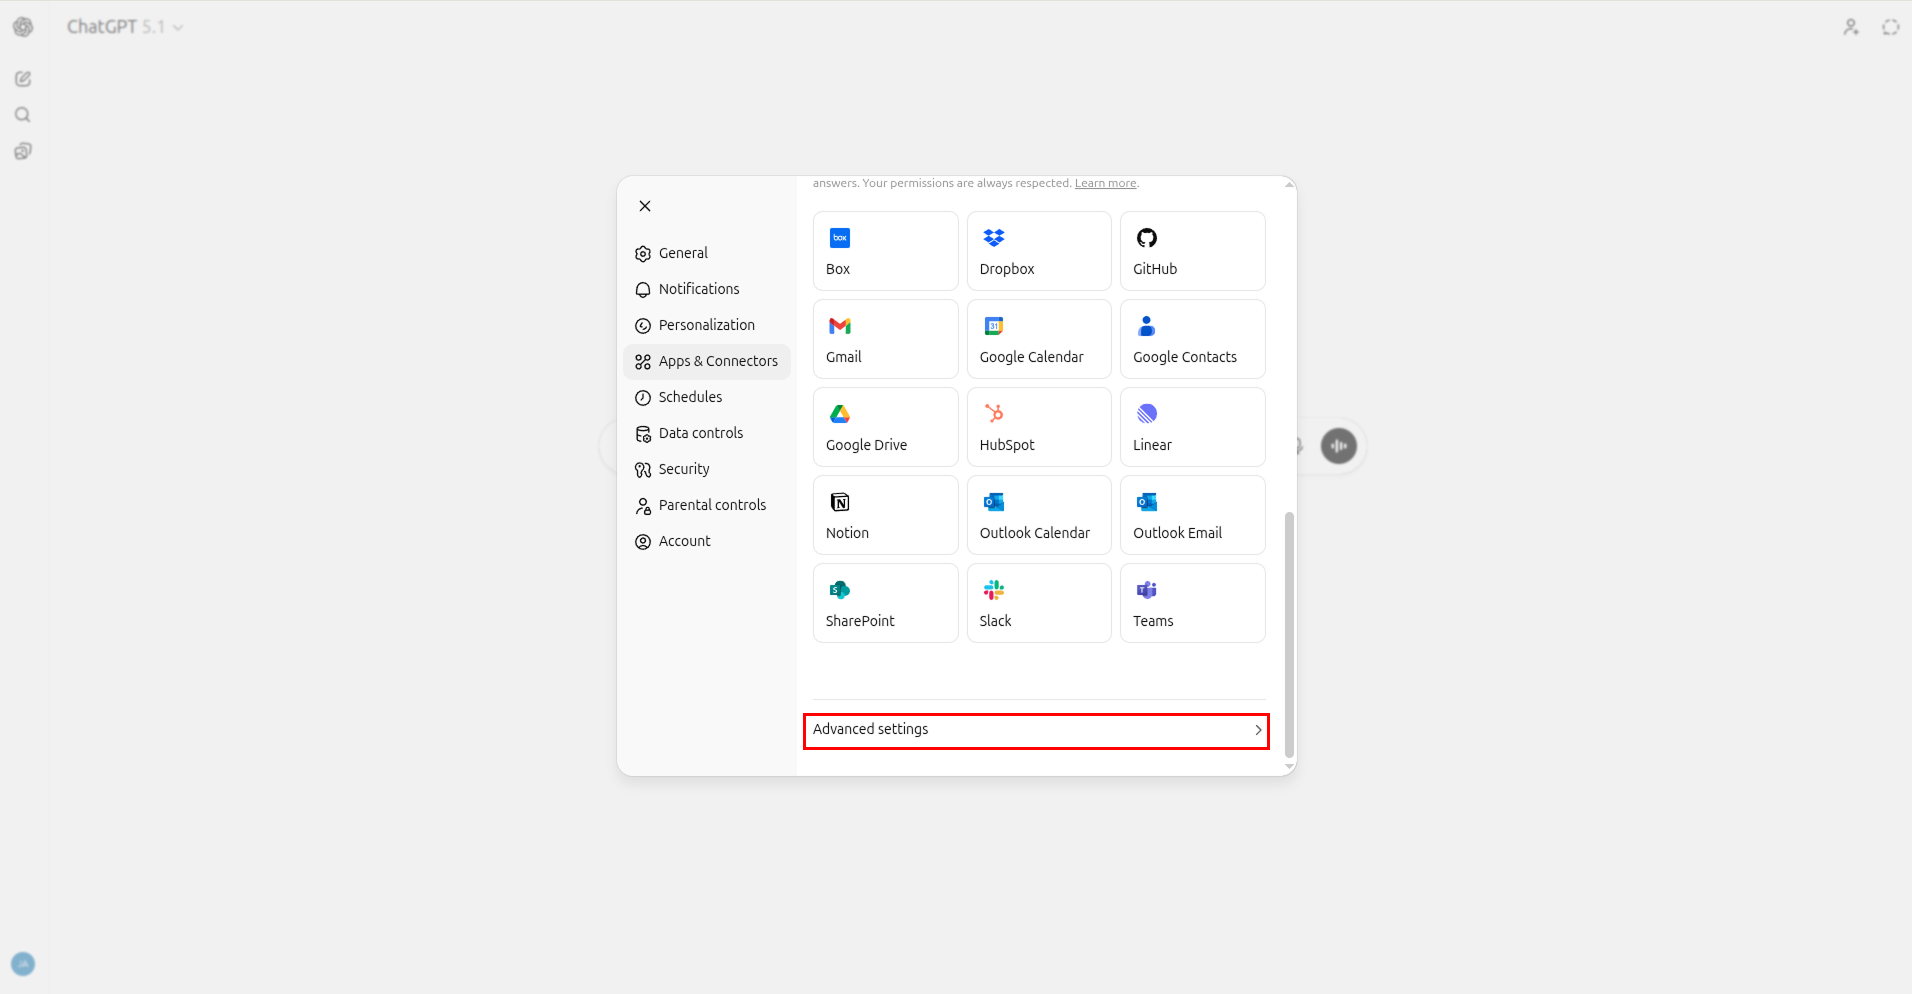
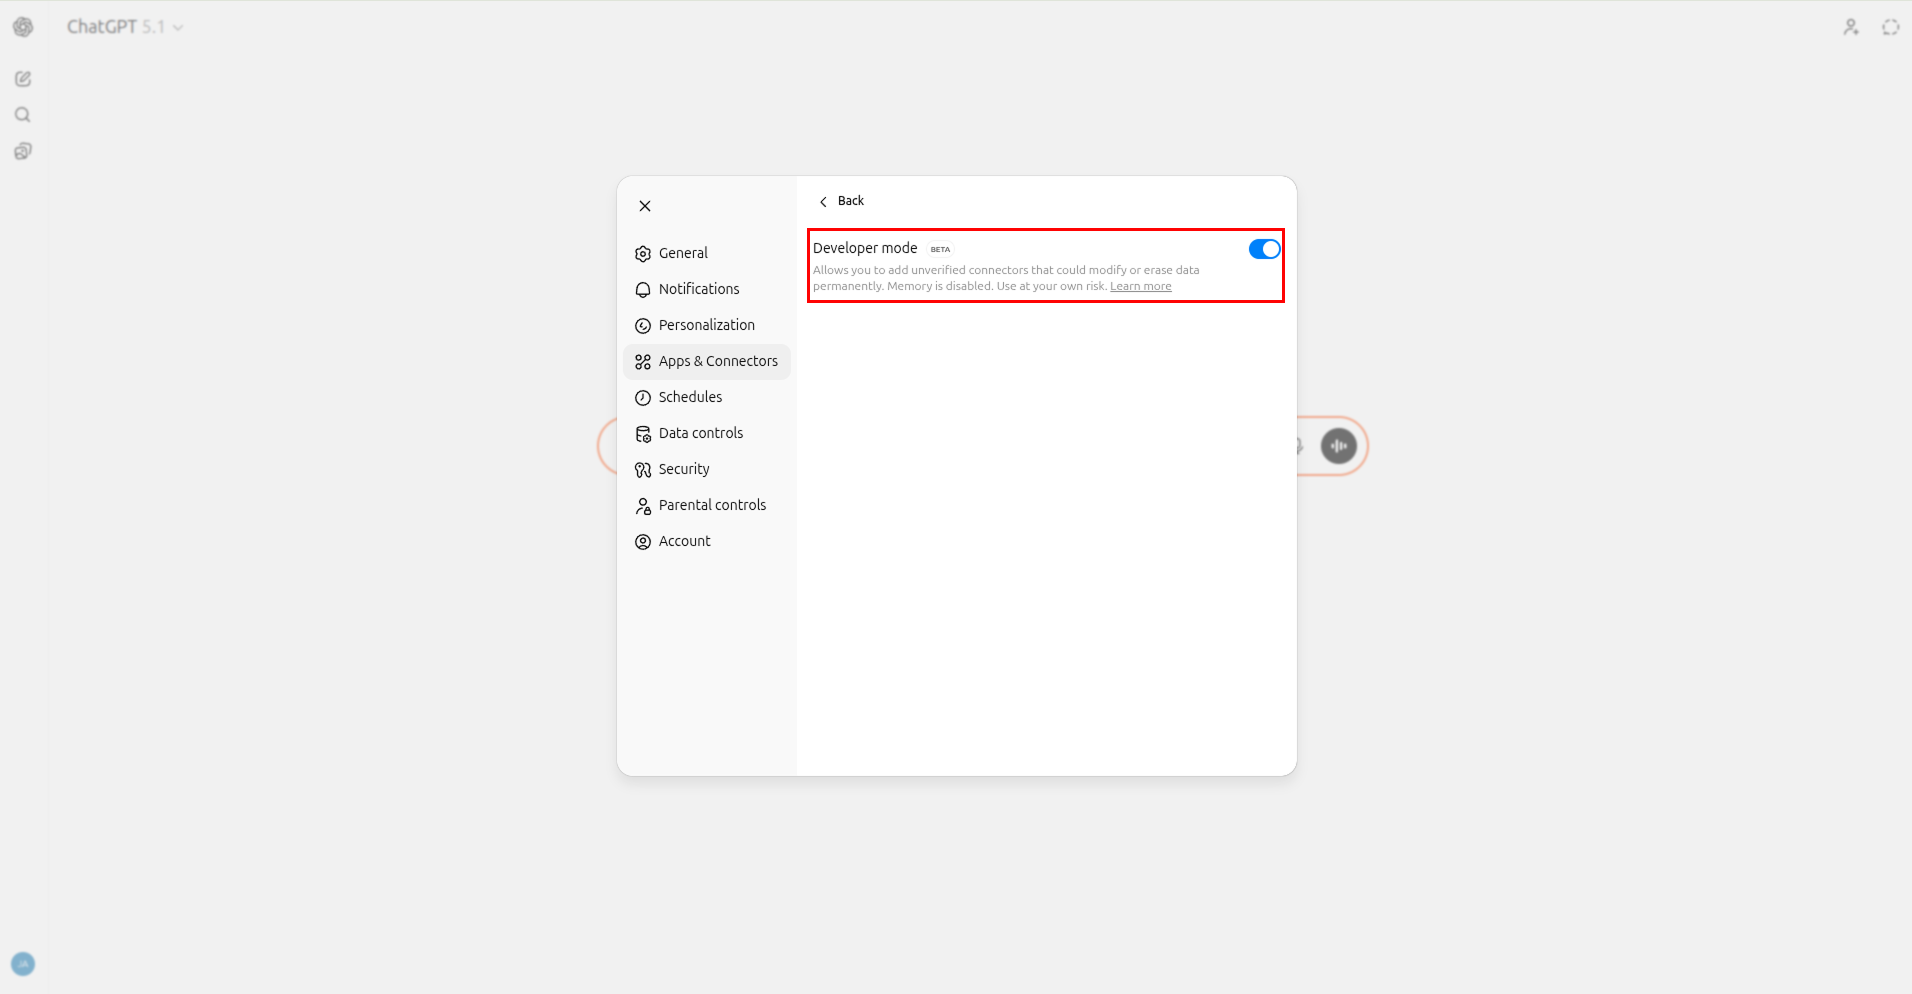
ChatGPT Plus, Team, Enterprise 계정만 MCP 베타 기능을 사용할 수 있습니다. 계정 메뉴에서 **Settings → Apps & Connectors → Advanced settings -> Developer mode (BETA)** 토글이 활성화되어야 합니다.
## 준비 사항
* 최신 버전의 ChatGPT 웹 또는 데스크톱 앱
* ChatGPT 계정에서 MCP 기능이 활성화된 상태
* 안정적인 네트워크 환경
## 1. ARGOS Identity MCP 서버 정보 확인
1. 문서 하단의 **Web URL 방식** 값을 복사합니다.
```
https://developers.argosidentity.com/mcp
```
## 2. ChatGPT에서 MCP 서버 등록
1. ChatGPT 화면 좌측 하단에서 **Settings**를 엽니다.
2. **Apps & Connectors** 탭의 하단에서 **Advanced settings**를 활성화 시킵니다.
1. ChatGPT 화면 좌측 하단에서 **Settings**를 엽니다.
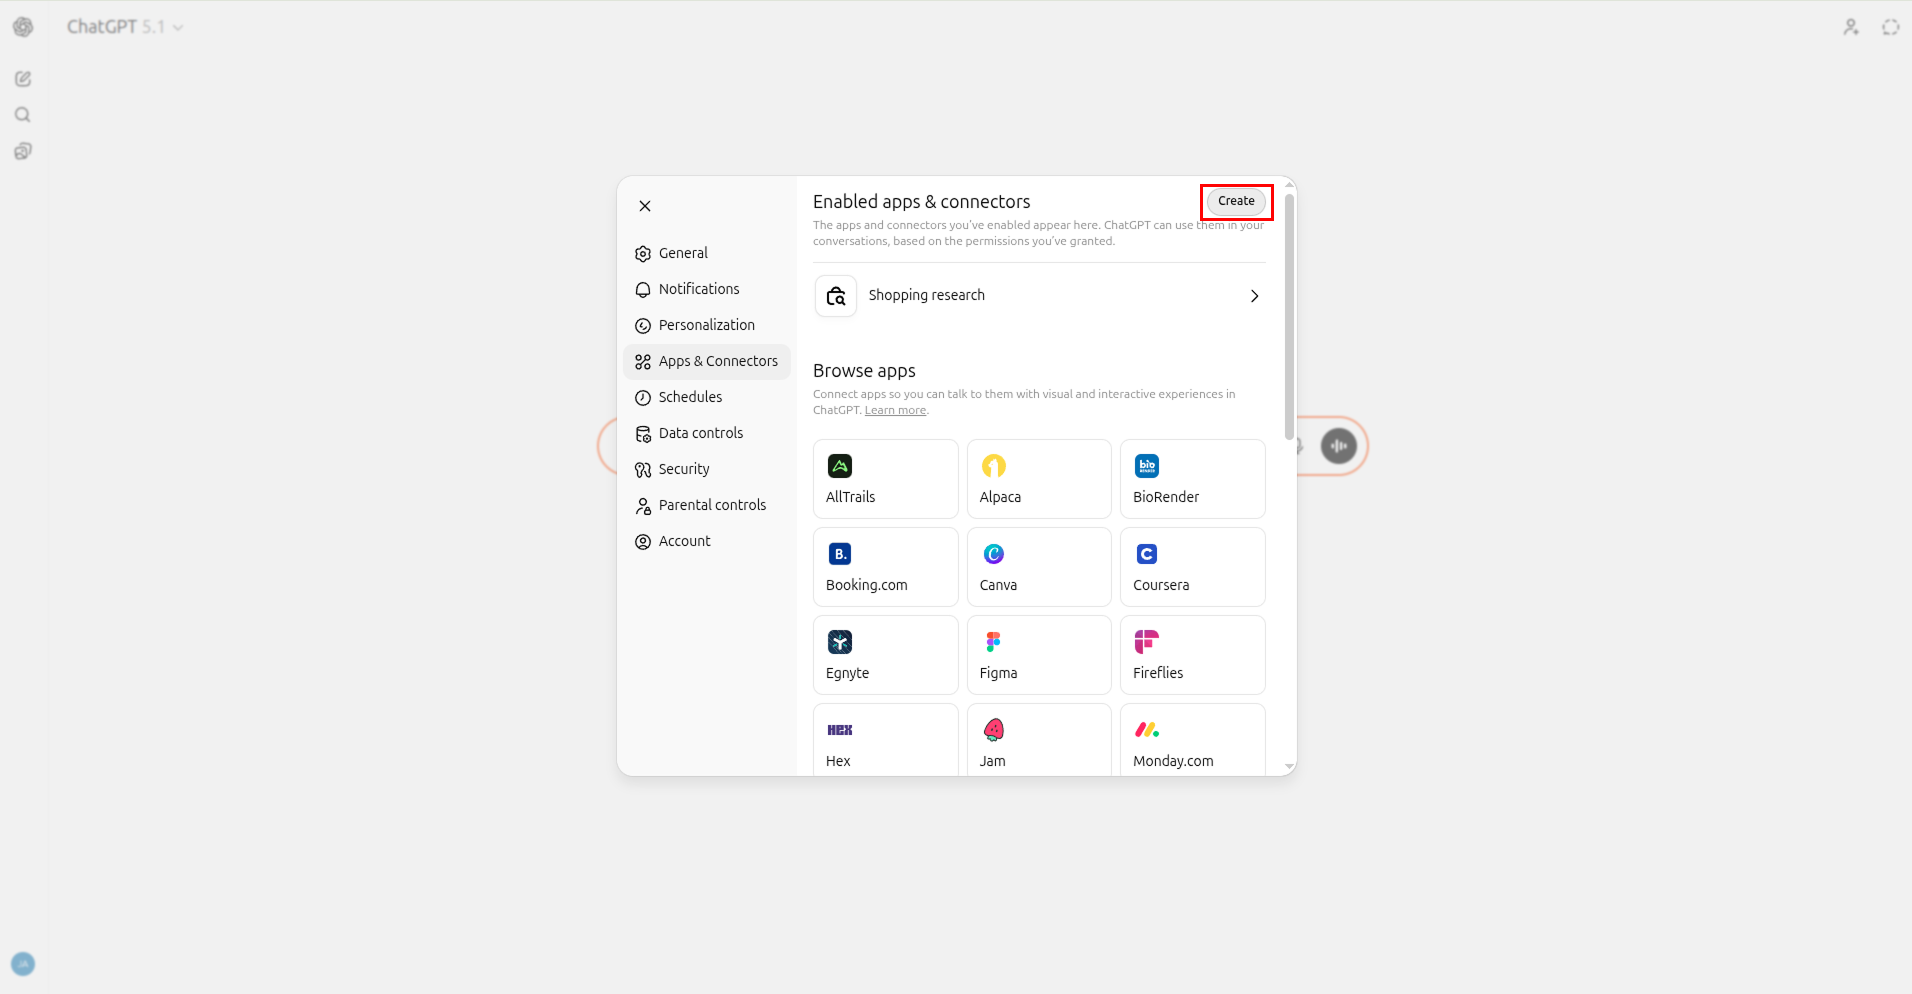
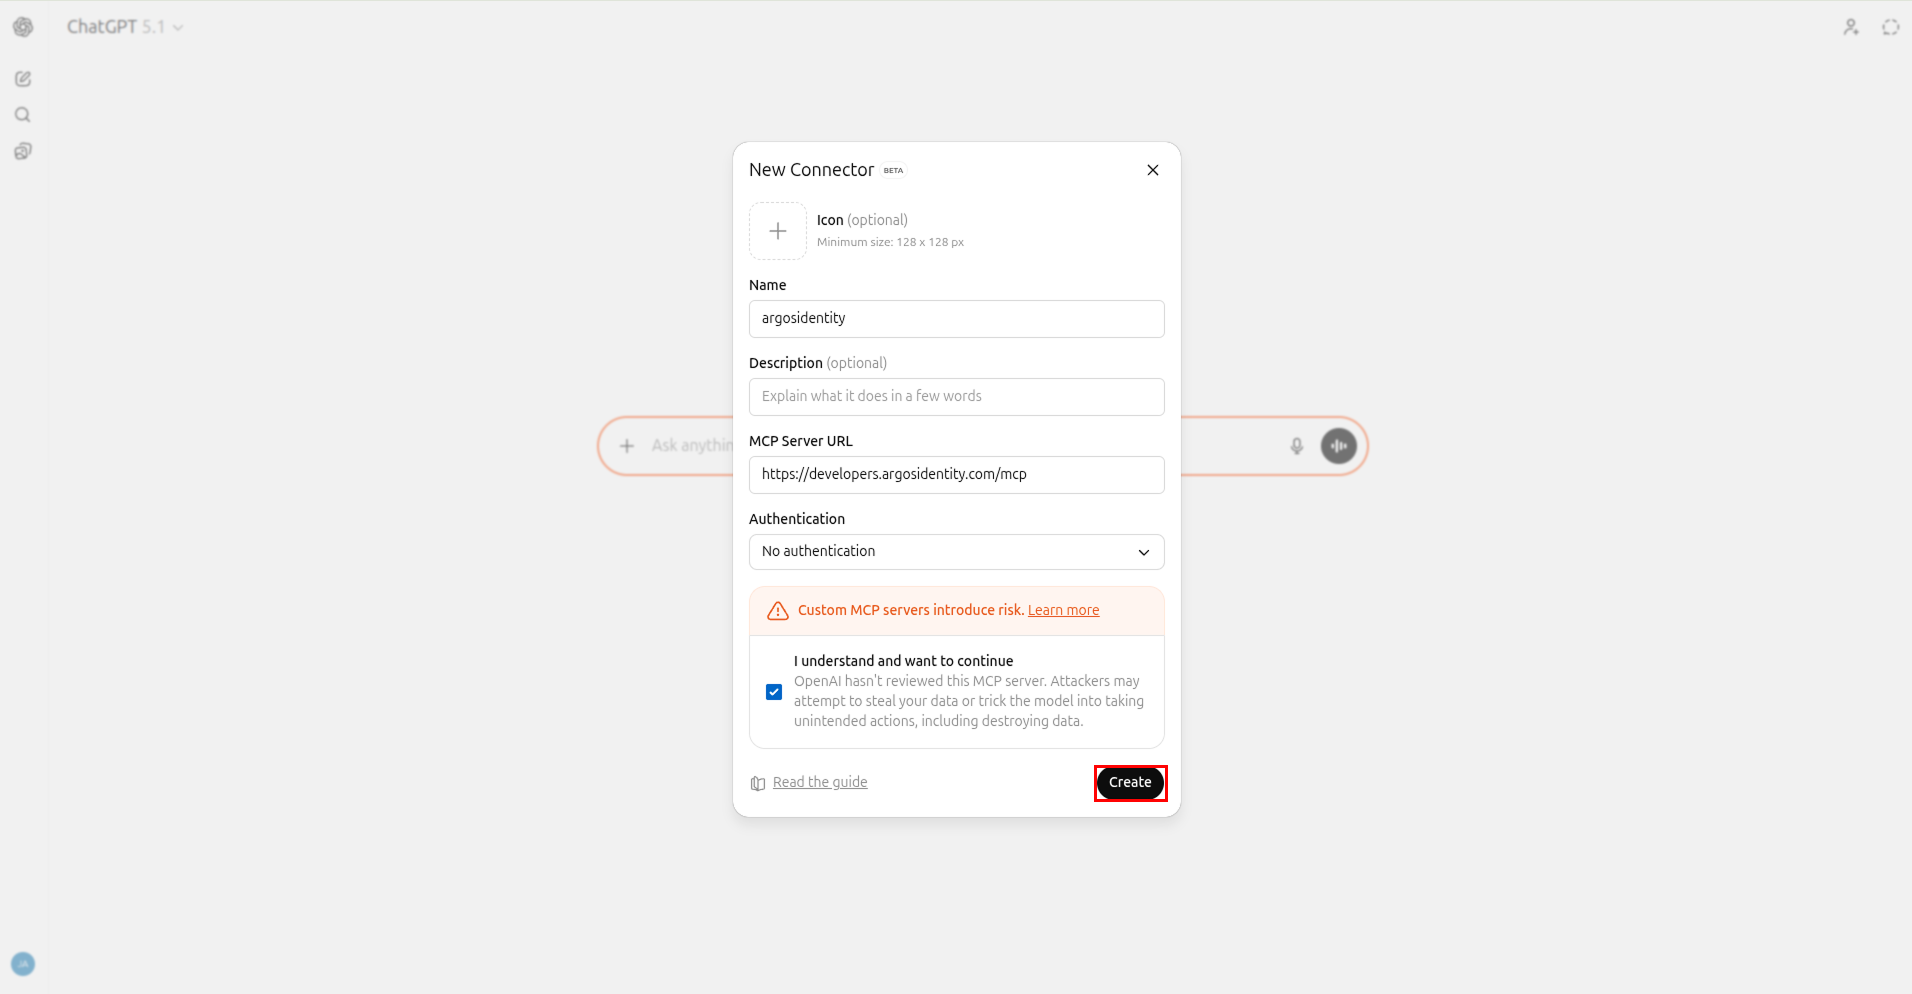
2. **Apps & Connectors** 탭의 상단에서 **Create** 버튼을 클릭합니다.
3. `https://developers.argosidentity.com/mcp`를 붙여넣고 이름을 `argosidentity`로 지정합니다.
4. **authentication**은 no authentication으로 변경 후 **Create**버튼을 클릭하세요.
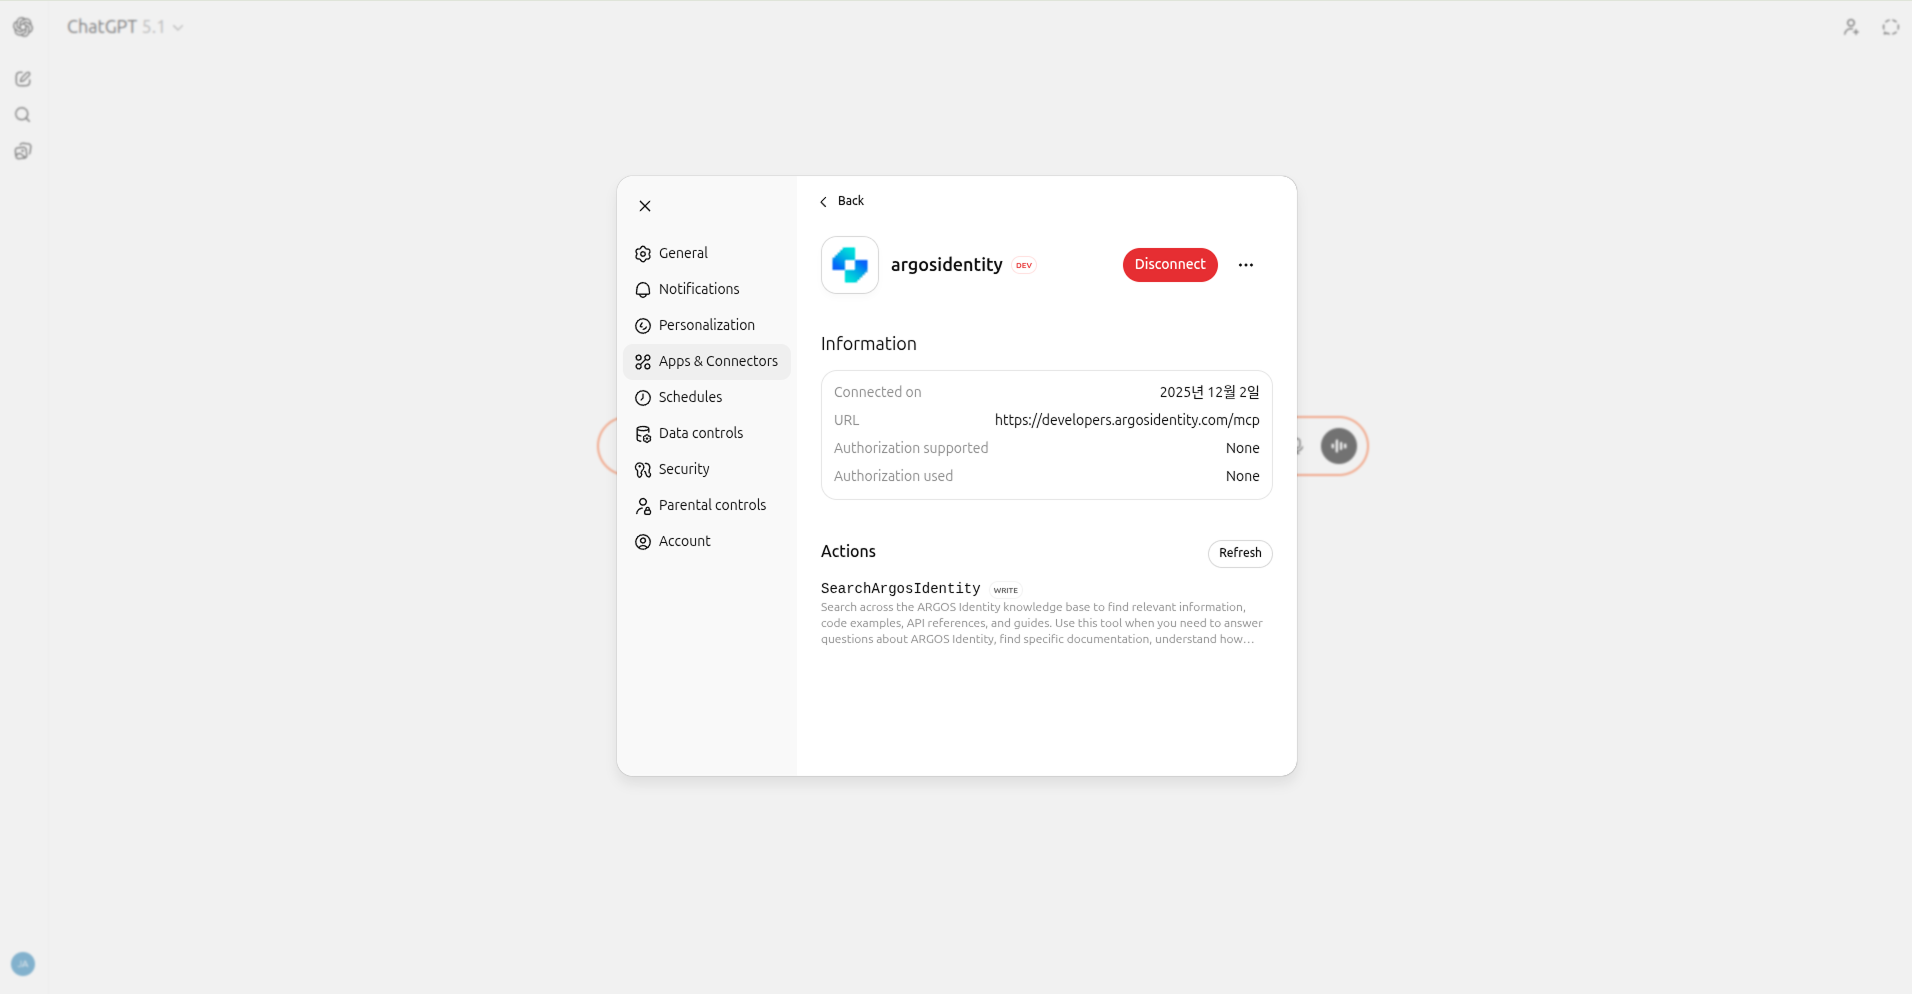
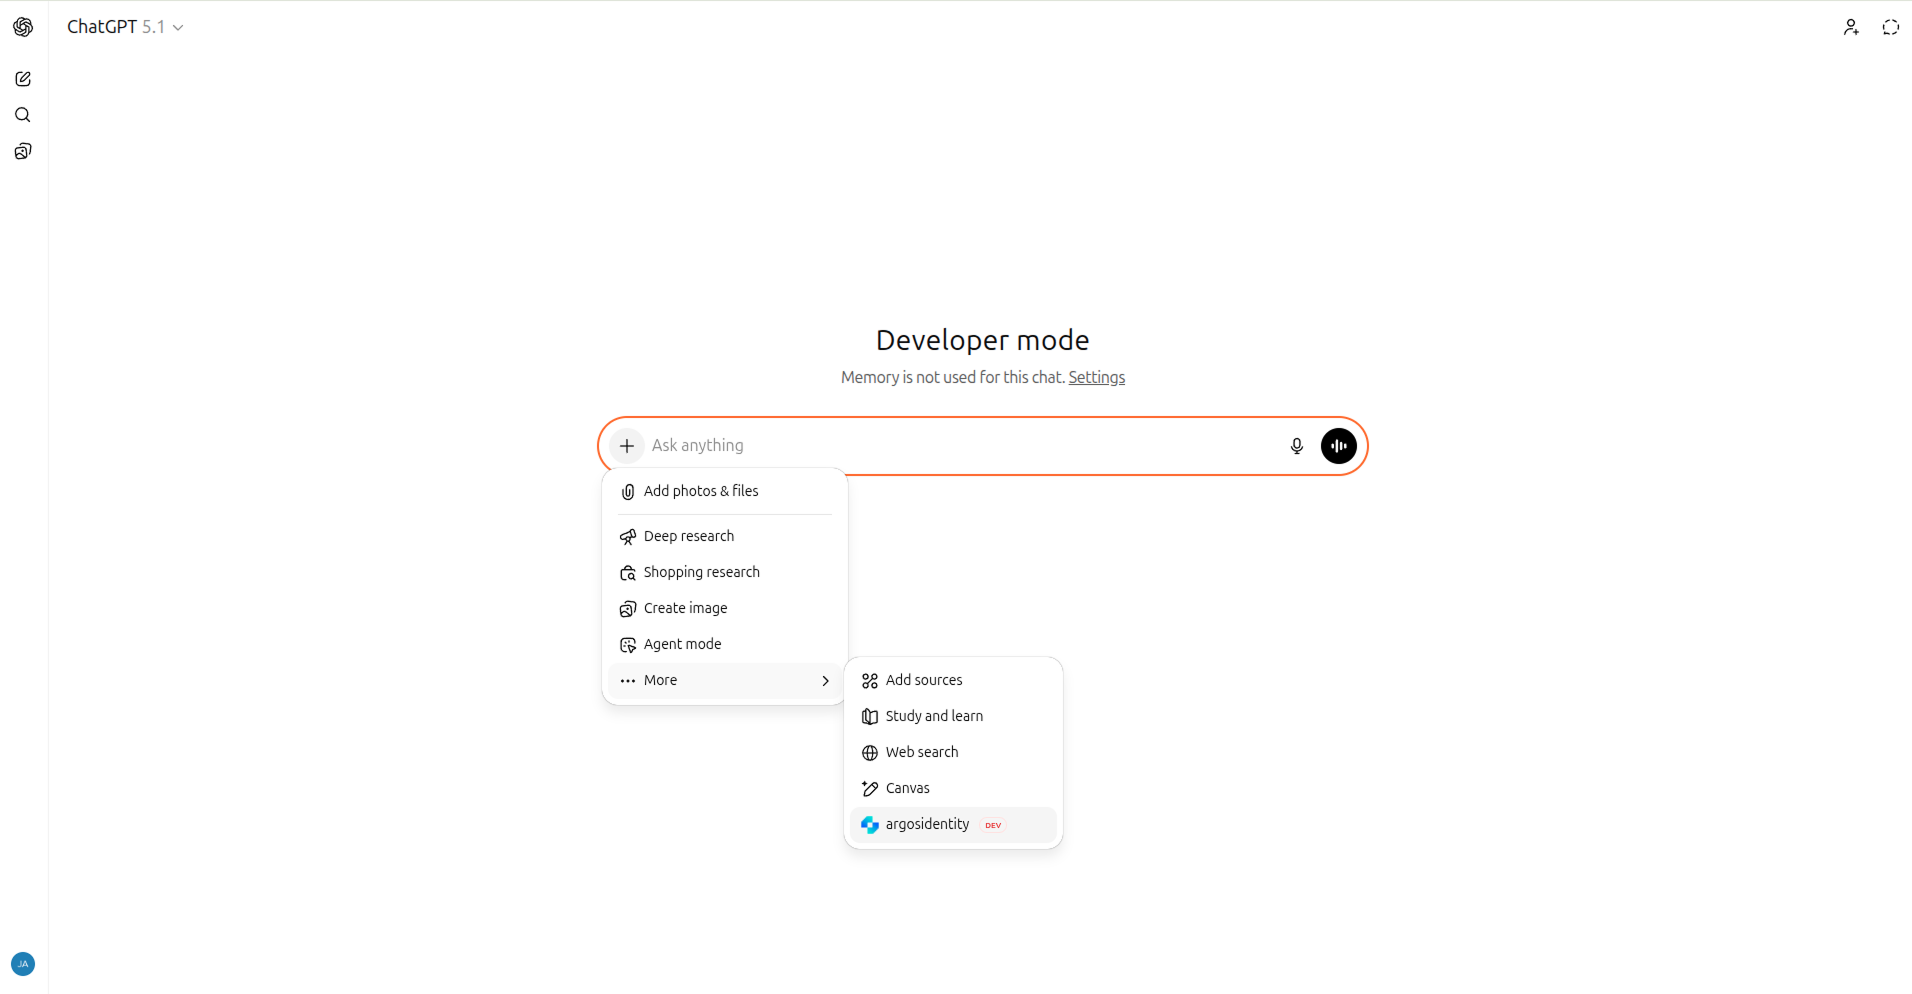
1. 새 대화를 시작한 뒤 좌측 패널의 **Connectors → MCP** 섹션에서 `argosidentity` 를 확인합니다.
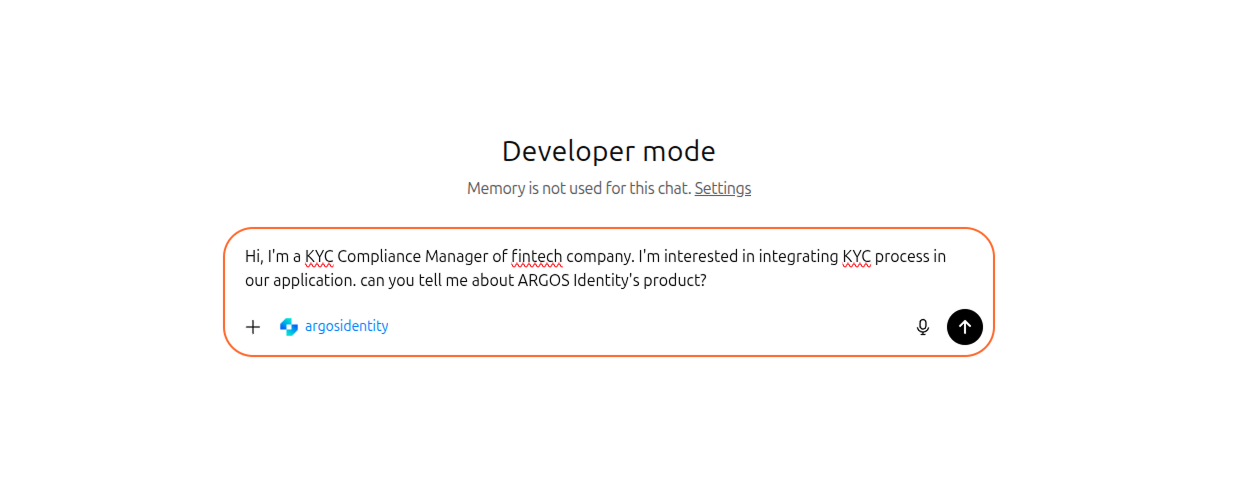
2. `@argosidentity "MCP 서버 연결 가이드 요약해 줘"`와 같이 호출해 응답을 받아봅니다.
응답에 ARGOS Identity 문서 출처가 표시되면 연결이 완료된 것입니다.
## 2-1. 단계별 화면 예시
 ## 3. 연결 후 사용 방법 (예시 프롬프트)
* 복잡한 정책이나 API 세부 정보를 묻기 전 `argosidentity MCP`를 붙여 정확한 출처를 지정하세요.
* Web과 데스크톱을 동시에 사용할 때는 한 플랫폼에서 서버를 삭제하면 다른 플랫폼에서도 제거된다는 점을 기억하세요.
```
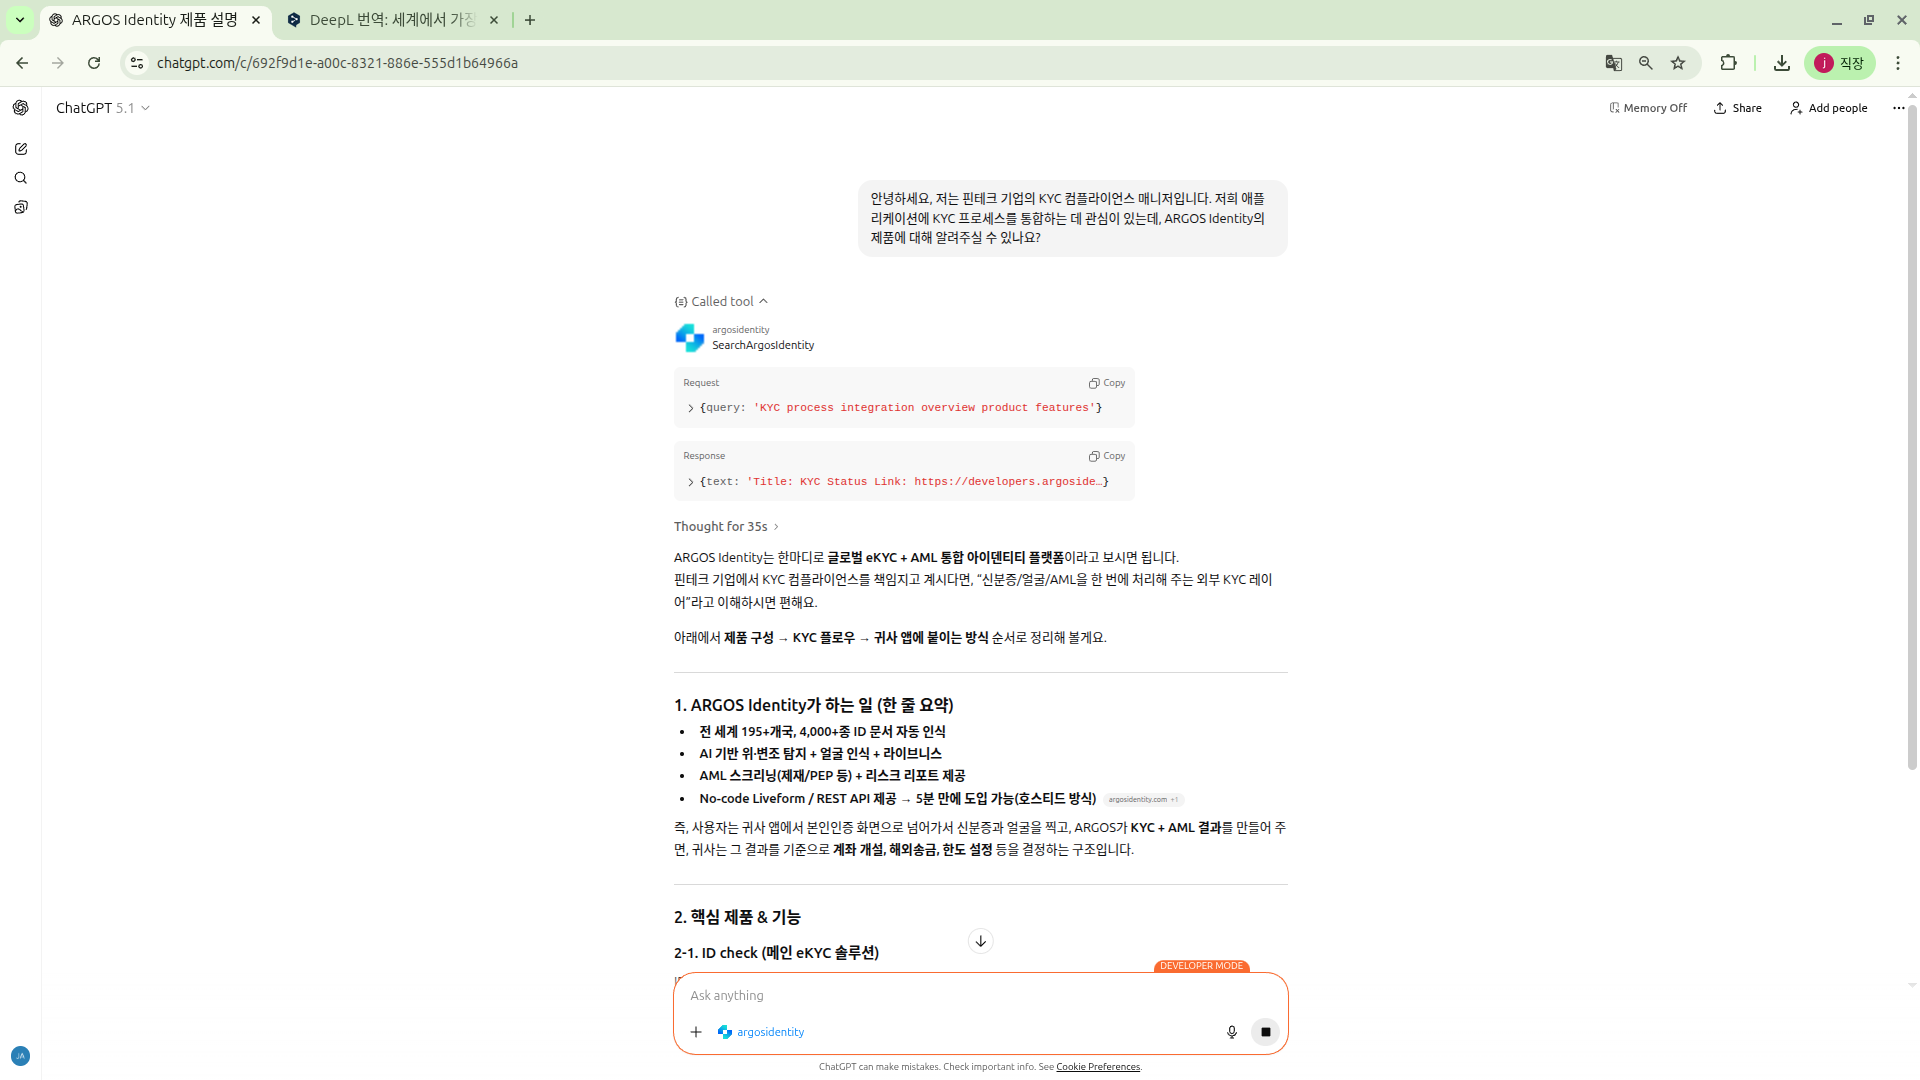
"안녕하세요, 저는 핀테크 기업의 KYC 컴플라이언스 매니저입니다.
저희 애플리케이션에 KYC 프로세스를 통합하는 데 관심이 있는데, ARGOS Identity의 제품에 대해 알려주실 수 있나요?
```
## 3. 연결 후 사용 방법 (예시 프롬프트)
* 복잡한 정책이나 API 세부 정보를 묻기 전 `argosidentity MCP`를 붙여 정확한 출처를 지정하세요.
* Web과 데스크톱을 동시에 사용할 때는 한 플랫폼에서 서버를 삭제하면 다른 플랫폼에서도 제거된다는 점을 기억하세요.
```
"안녕하세요, 저는 핀테크 기업의 KYC 컴플라이언스 매니저입니다.
저희 애플리케이션에 KYC 프로세스를 통합하는 데 관심이 있는데, ARGOS Identity의 제품에 대해 알려주실 수 있나요?
```
 ## 4. 문제 해결
* 계정이 ChatGPT Plus 이상인지 확인합니다.
* 브라우저 캐시 삭제 후 다시 로그인합니다.
* 여전히 보이지 않으면 **Settings & Beta → About**에서 클라이언트 버전이 2024.11 이상인지 확인하세요.
* URL 끝에 슬래시(`/`)가 없는지 확인하고 다시 저장합니다.
* 네트워크에서 `developers.argosidentity.com` 도메인이 차단되어 있지 않은지 방화벽 정책을 점검하세요.
* 5분 이상 응답이 없으면 서버 목록에서 **Reconnect**를 눌러 세션을 초기화합니다.
* 서버 설정은 계정 단위로 동기화되므로, 한쪽에서 제거하면 다른 쪽에서도 사라집니다.
AI가 생성한 응답은 참고용이며 항상 정확하지 않을 수 있습니다. 이상하거나 추가 확인이 필요하면 ARGOS Identity 지원 채널로 직접 문의해 주세요.
## 다음 단계
* 더 고급 프롬프트 전략은 `Developer-Guide-MCP` 내 다른 문서를 참고하세요.
* 내부 규정에 맞춰 응답을 재사용하려면 ChatGPT의 **Custom Instructions**와 MCP를 함께 설정하세요.
* 개발시에는 cursor와 같은 개발자 도구에 직접 MCP를 붙여서 사용하시는 법이 더 효과적 입니다.
## 4. 문제 해결
* 계정이 ChatGPT Plus 이상인지 확인합니다.
* 브라우저 캐시 삭제 후 다시 로그인합니다.
* 여전히 보이지 않으면 **Settings & Beta → About**에서 클라이언트 버전이 2024.11 이상인지 확인하세요.
* URL 끝에 슬래시(`/`)가 없는지 확인하고 다시 저장합니다.
* 네트워크에서 `developers.argosidentity.com` 도메인이 차단되어 있지 않은지 방화벽 정책을 점검하세요.
* 5분 이상 응답이 없으면 서버 목록에서 **Reconnect**를 눌러 세션을 초기화합니다.
* 서버 설정은 계정 단위로 동기화되므로, 한쪽에서 제거하면 다른 쪽에서도 사라집니다.
AI가 생성한 응답은 참고용이며 항상 정확하지 않을 수 있습니다. 이상하거나 추가 확인이 필요하면 ARGOS Identity 지원 채널로 직접 문의해 주세요.
## 다음 단계
* 더 고급 프롬프트 전략은 `Developer-Guide-MCP` 내 다른 문서를 참고하세요.
* 내부 규정에 맞춰 응답을 재사용하려면 ChatGPT의 **Custom Instructions**와 MCP를 함께 설정하세요.
* 개발시에는 cursor와 같은 개발자 도구에 직접 MCP를 붙여서 사용하시는 법이 더 효과적 입니다.