> ## Documentation Index
> Fetch the complete documentation index at: https://developers.argosidentity.com/llms.txt
> Use this file to discover all available pages before exploring further.
# Connect MCP in ChatGPT
> How to register the ARGOS Identity Developer Guide MCP server in ChatGPT and use it effectively.
## MCP overview
Connecting the ARGOS Identity MCP server to ChatGPT gives you instant access to the latest developer guide from both the web and desktop apps. The steps below apply to both platforms, and once the server is added it syncs across your entire account.
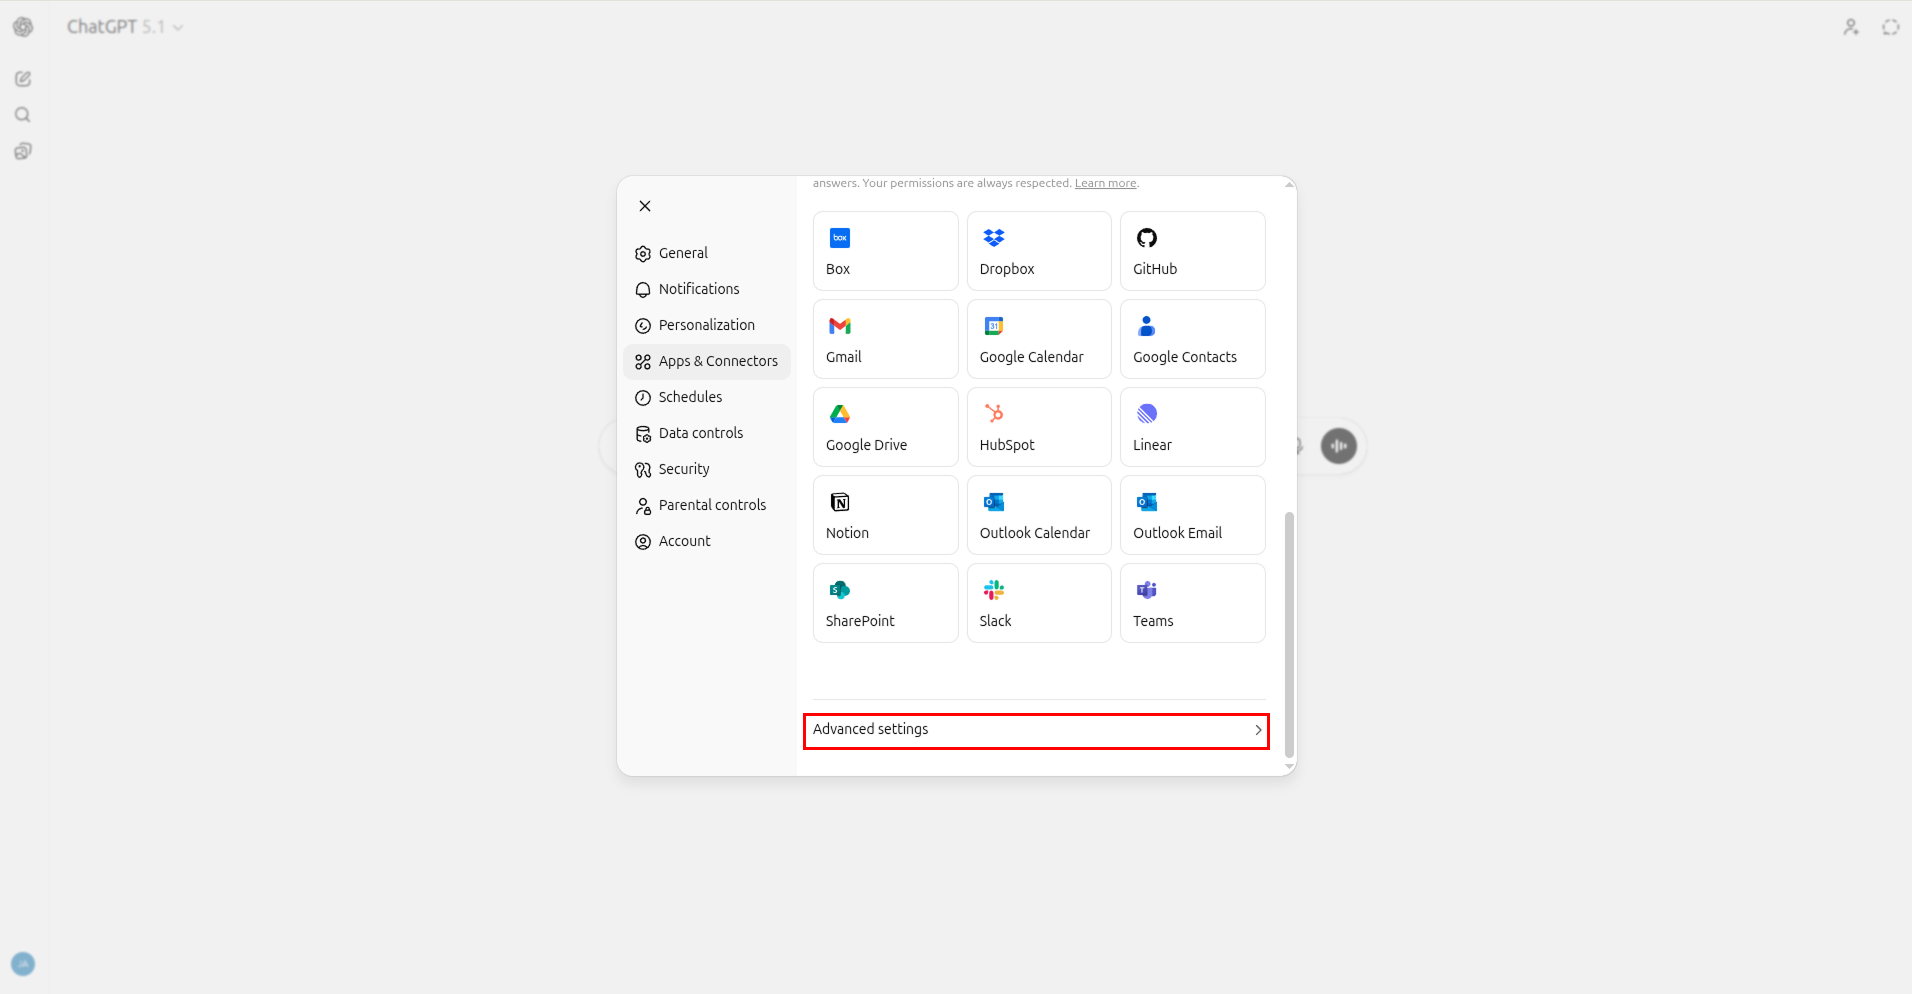
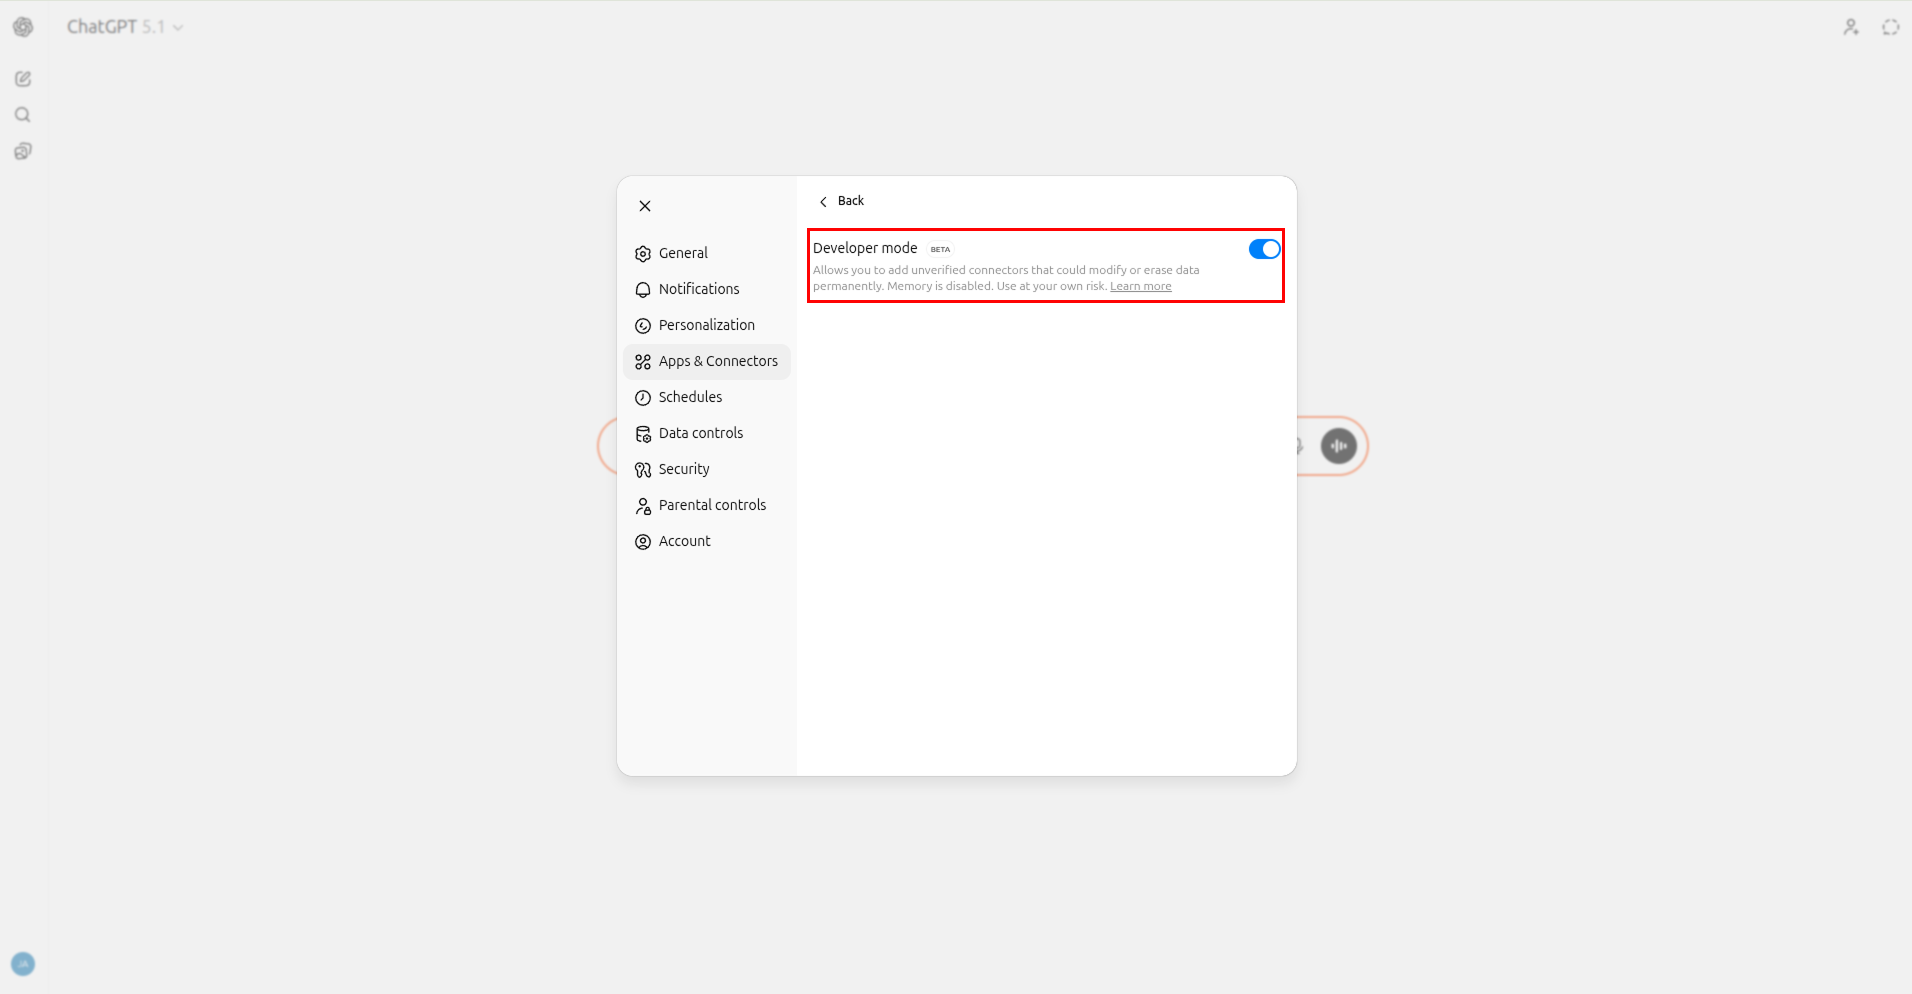
Only ChatGPT Plus, Team, and Enterprise accounts can enable the MCP beta. Make sure **Settings → Apps & Connectors → Advanced settings -> Developer mode (BETA)** is turned on.
## Requirements
* Latest ChatGPT web or desktop application
* ChatGPT account with the MCP beta enabled
* Stable network connection
## 1. Copy the ARGOS Identity MCP server URL
1. Copy the **Web URL** provided at the bottom of this guide.
```
https://developers.argosidentity.com/mcp
```
## 2. Register the MCP server in ChatGPT
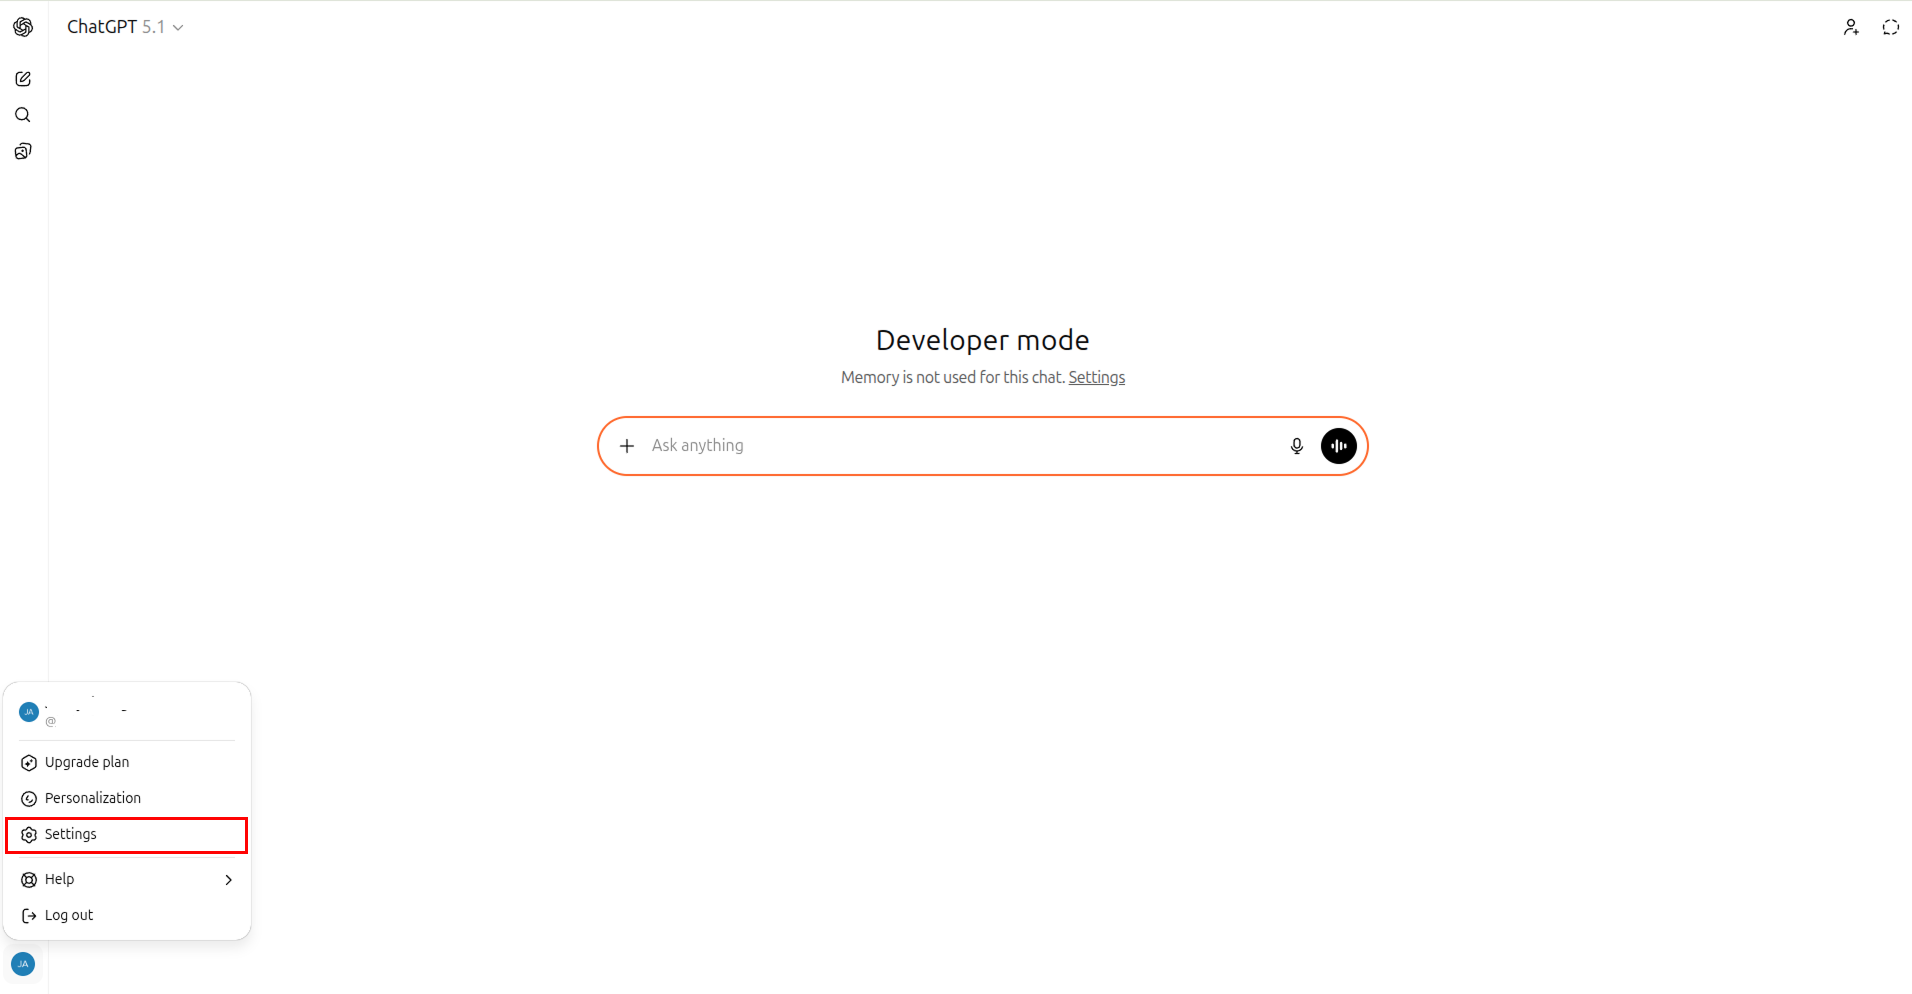
1. Open **Settings** from the lower-left profile menu.
2. In **Apps & Connectors**, enable **Advanced settings** at the bottom.
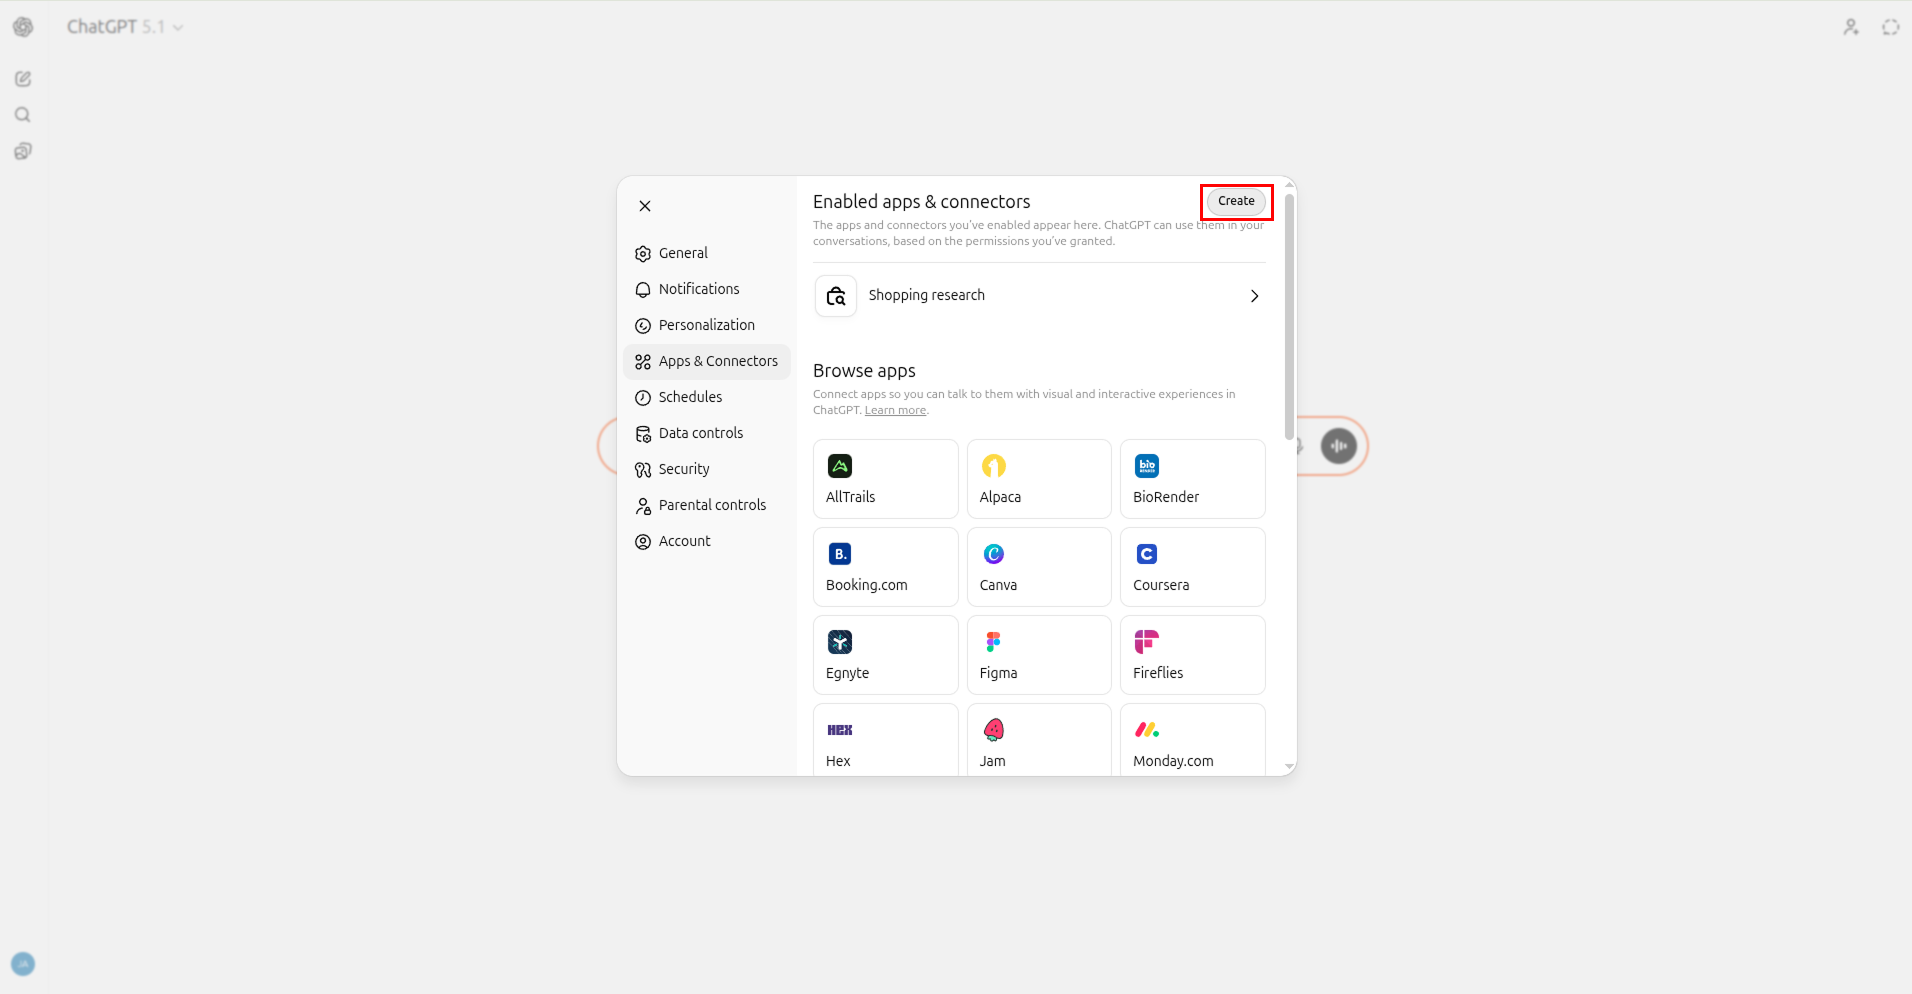
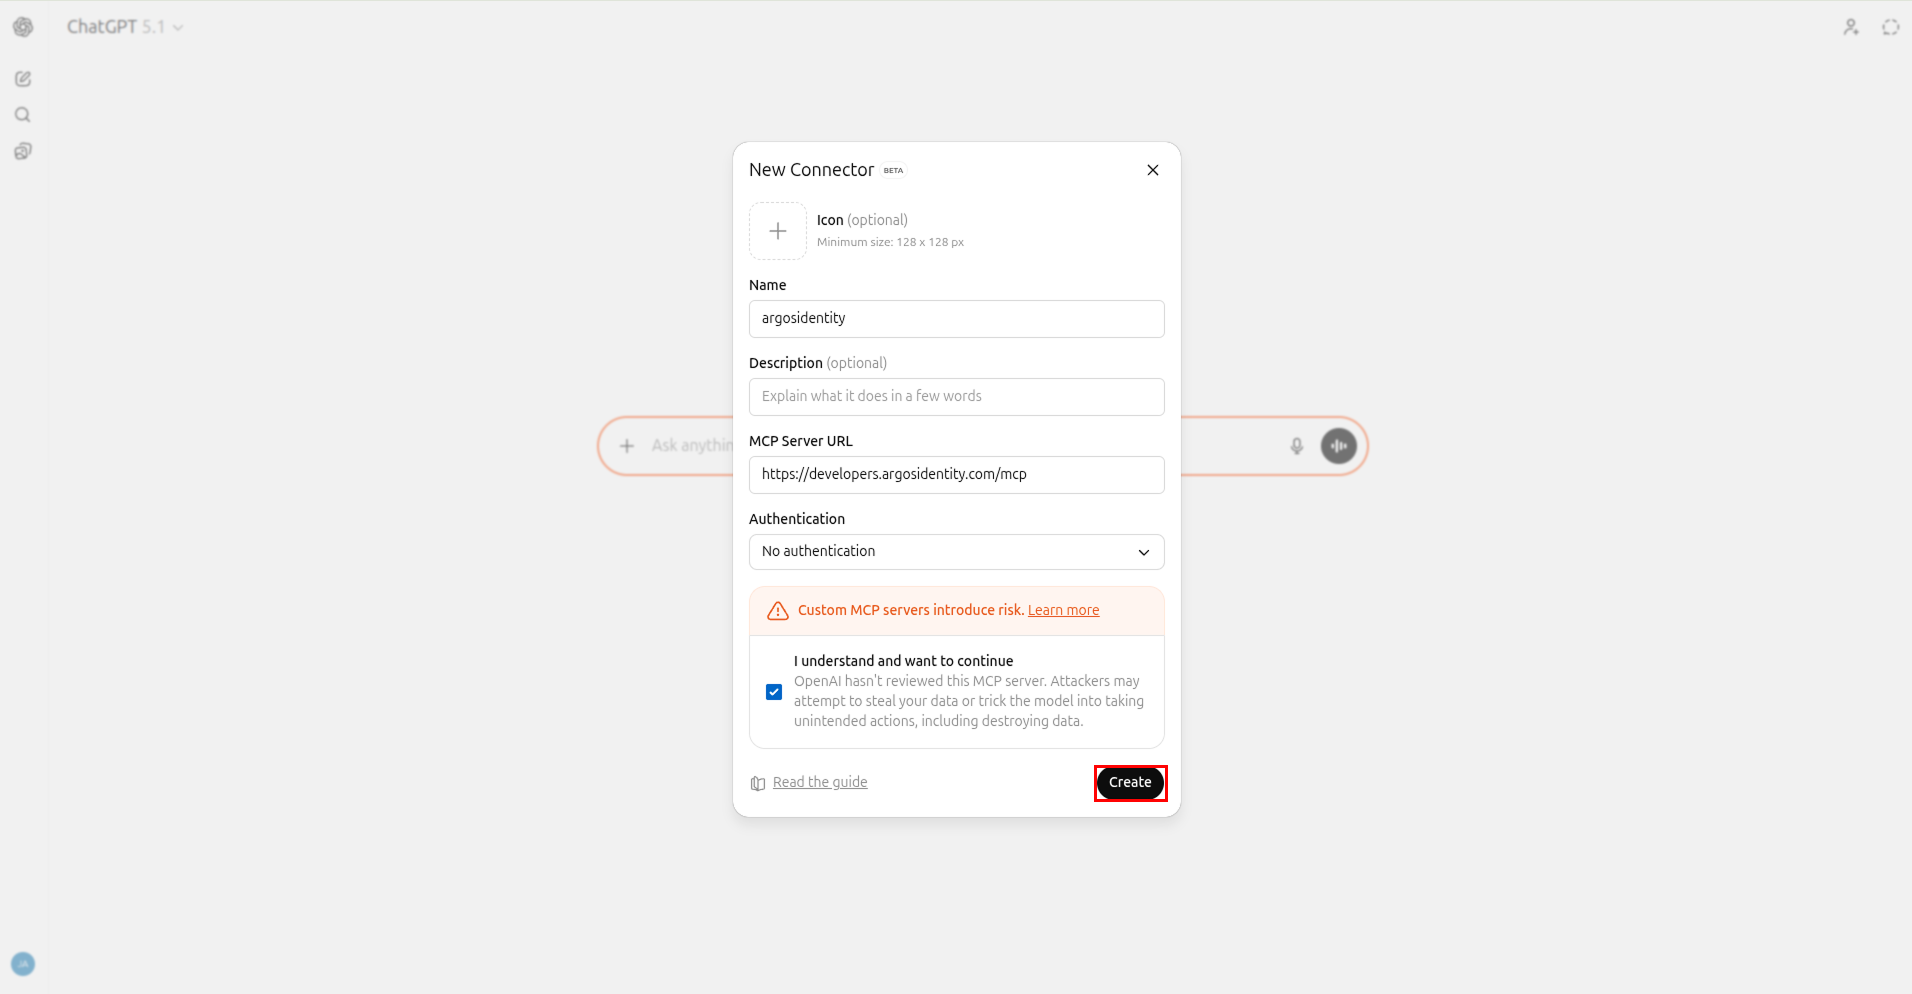
1. From **Settings**, return to **Apps & Connectors**.
2. Click **Create** at the top of the panel.
3. Paste `https://developers.argosidentity.com/mcp` and name the connector `argosidentity`.
4. Change **Authentication** to **No authentication**, then click **Create**.
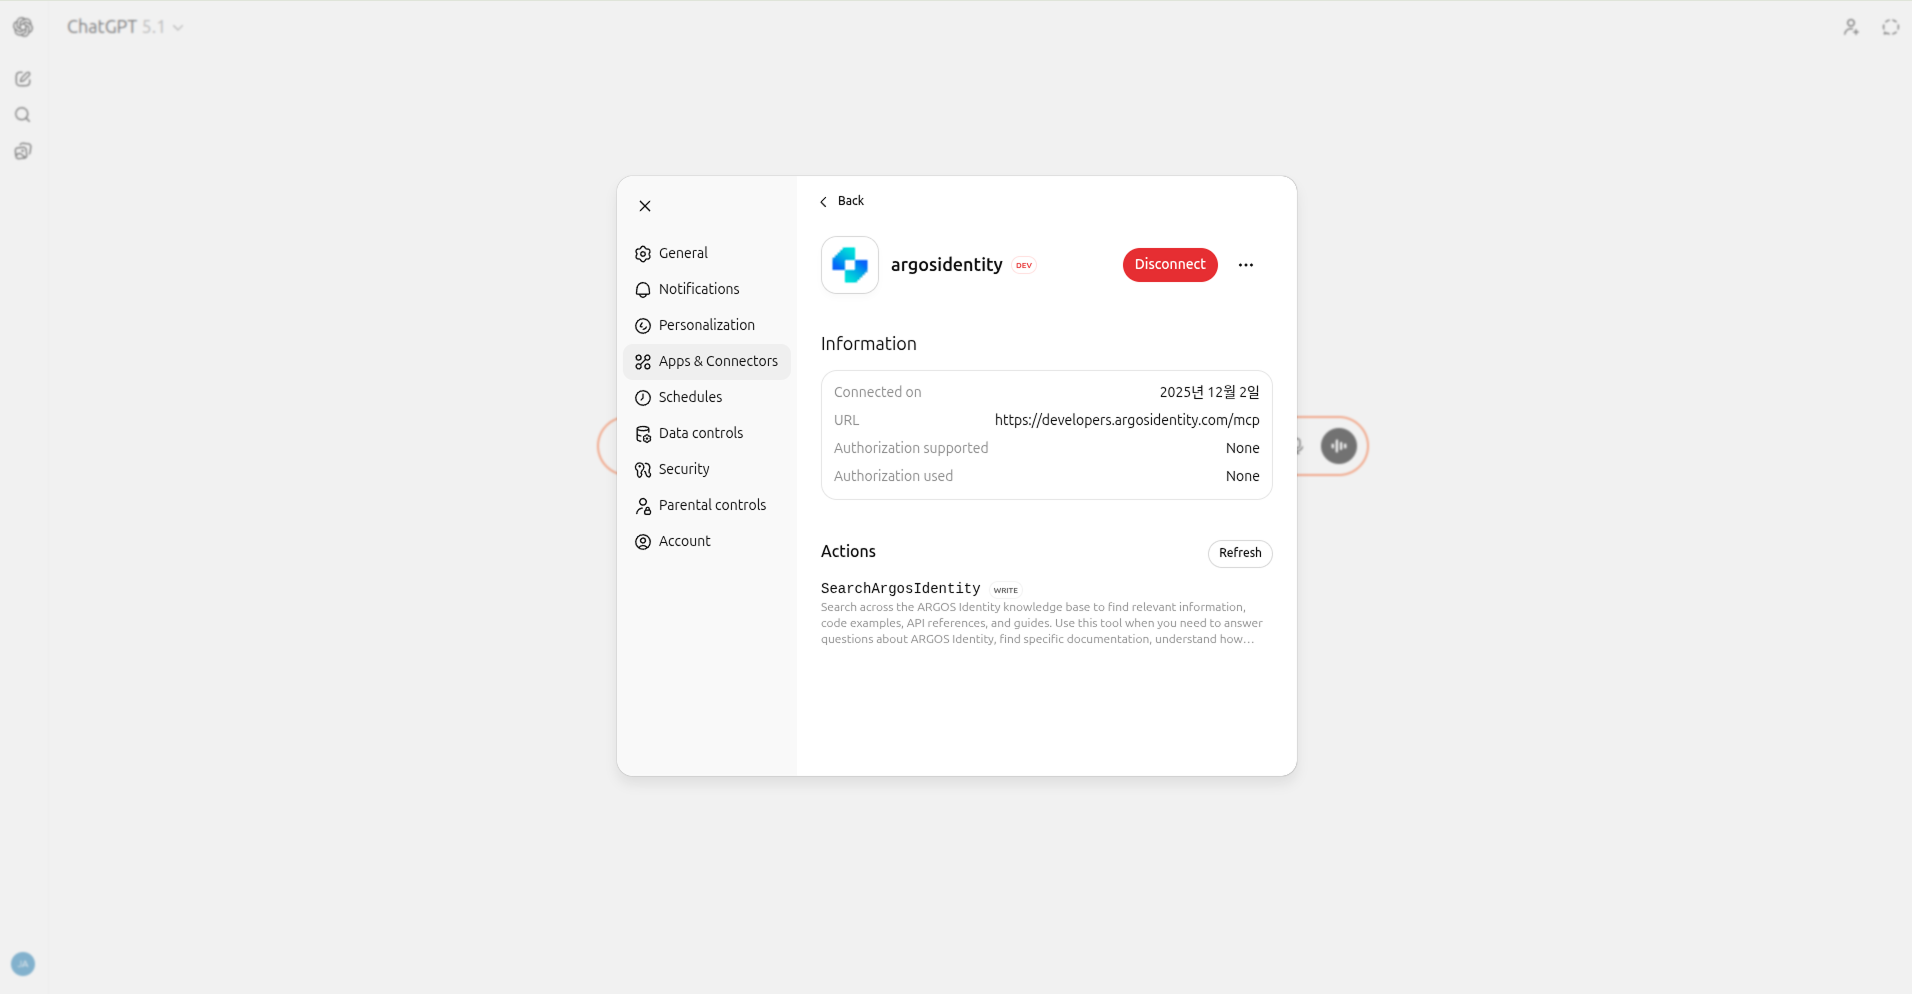
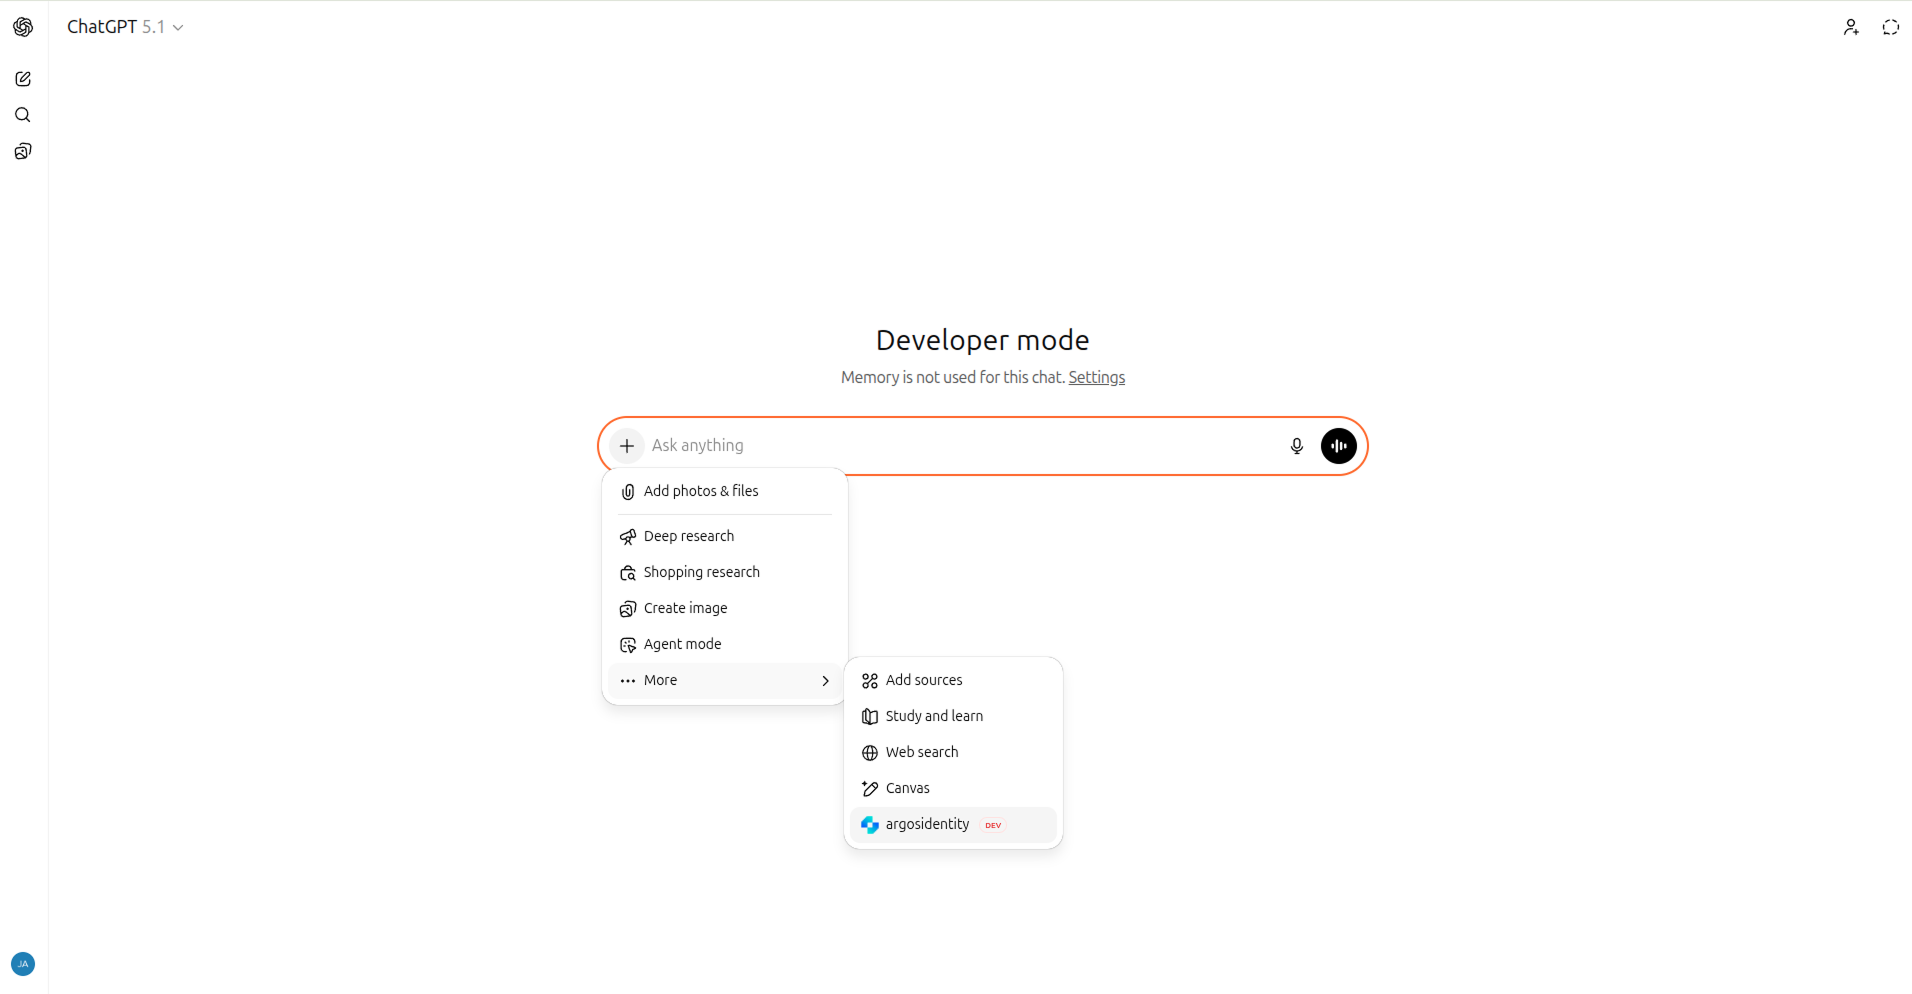
1. Start a new chat and open **Connectors → MCP** in the left sidebar.
2. Confirm that `argosidentity` is listed, then try a prompt like `@argosidentity "Summarize the MCP connector setup guide"` to ensure it responds.
If the reply cites ARGOS Identity documentation, the connector is working.
## 2-1. Screen walkthrough
 ## 3. Use the connector (prompt examples)
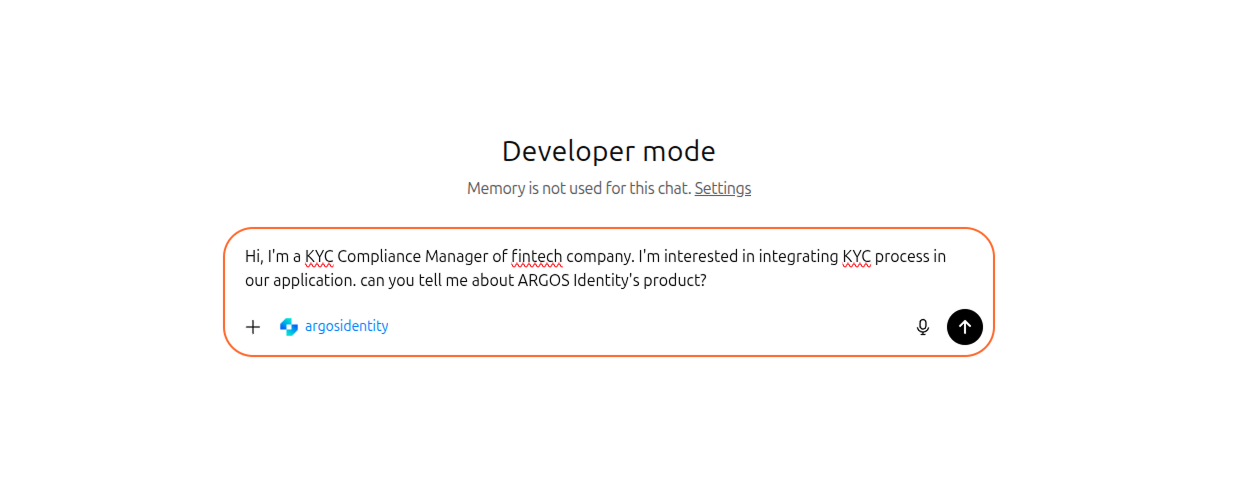
* Always prefix detailed questions with `@argosidentity MCP` to ensure the correct source is used.
* Remember that deleting the connector on one platform removes it everywhere because the settings sync per account.
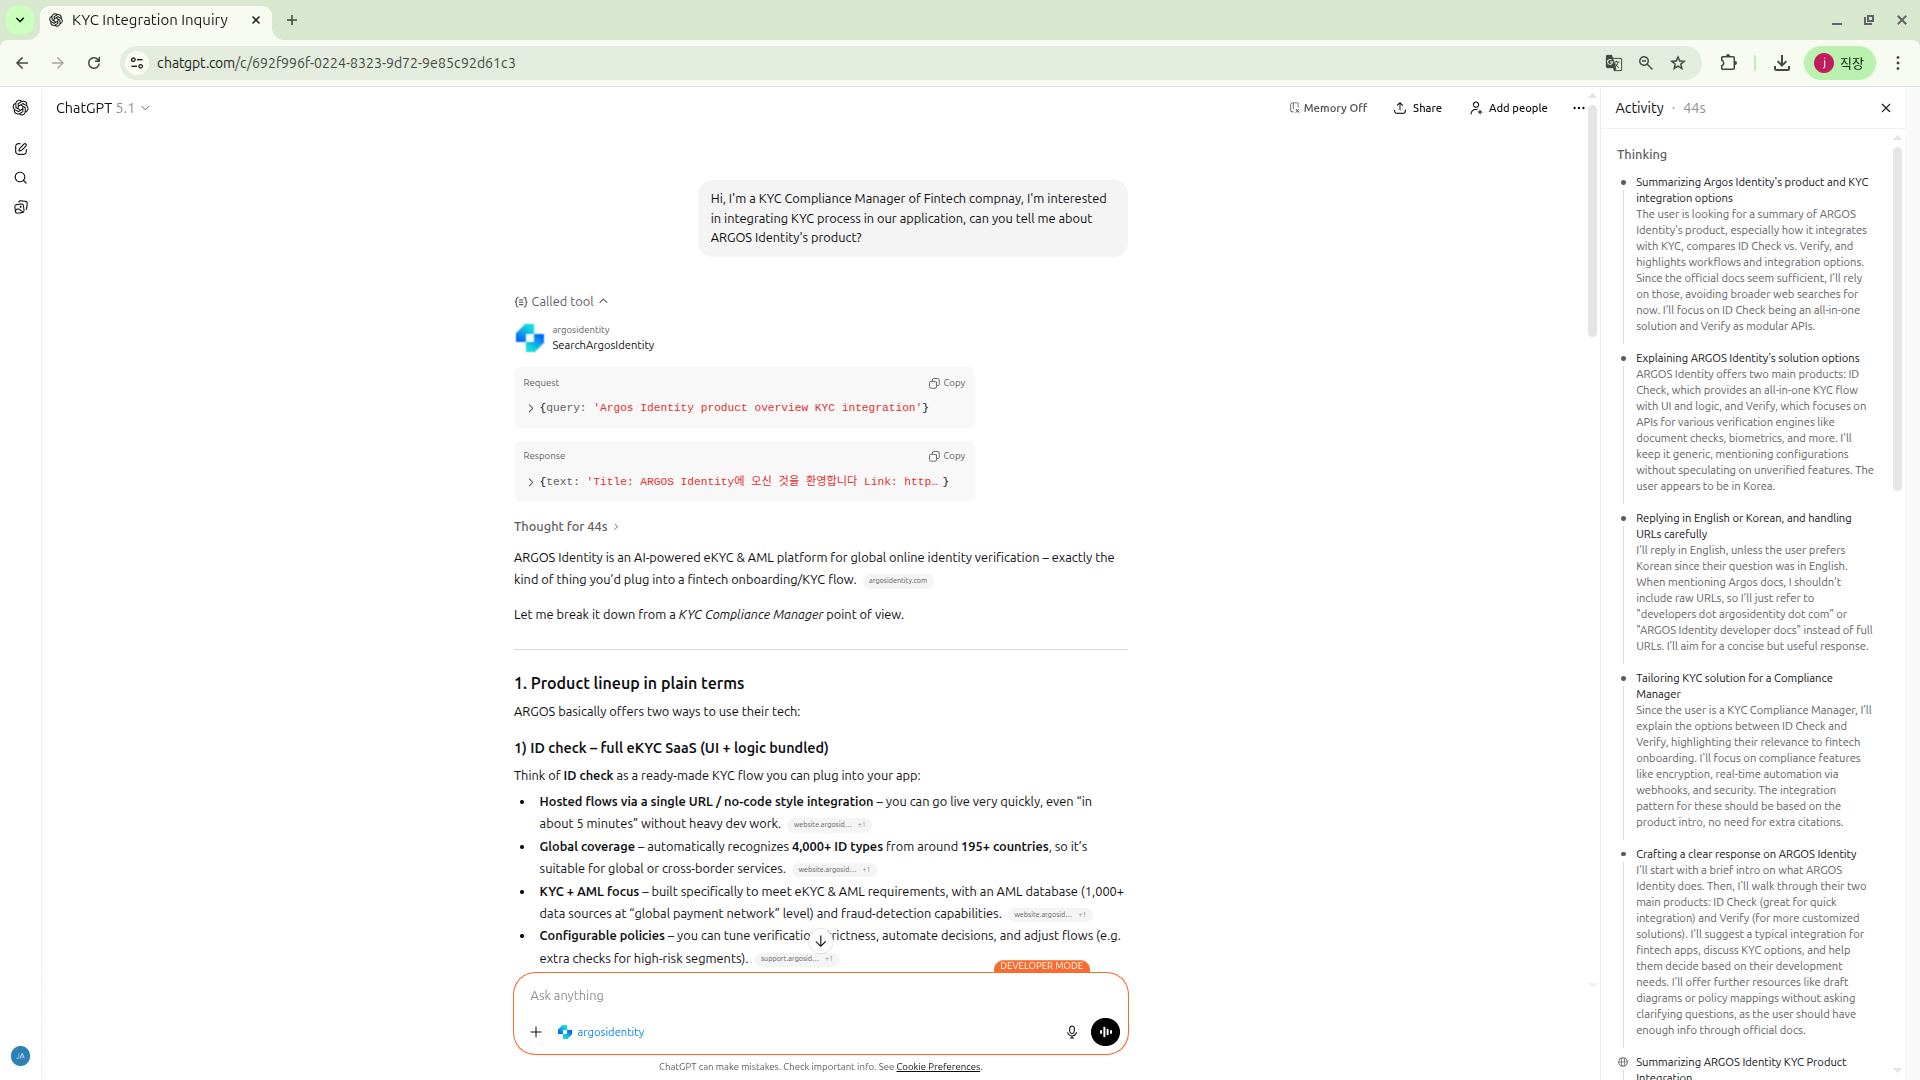
```
"Hi, I'm a KYC Compliance Manager of Fintech compnay,
I'm interested in integrating KYC process in our application, can you tell me about ARGOS Identity's product?"
```
## 3. Use the connector (prompt examples)
* Always prefix detailed questions with `@argosidentity MCP` to ensure the correct source is used.
* Remember that deleting the connector on one platform removes it everywhere because the settings sync per account.
```
"Hi, I'm a KYC Compliance Manager of Fintech compnay,
I'm interested in integrating KYC process in our application, can you tell me about ARGOS Identity's product?"
```
 ## 4. Troubleshooting
* Confirm you are on ChatGPT Plus, Team, or Enterprise.
* Clear your browser cache and sign in again.
* Check **Settings & Beta → About** to verify that the client version is 2024.11 or later.
* Remove any trailing slash (`/`) from the URL and save again.
* Ensure `developers.argosidentity.com` is not blocked by your firewall.
* If you still get no response after 5 minutes, click **Reconnect** in the connector list to refresh the session.
* Connector settings sync at the account level, so deleting it on one platform removes it everywhere.
ChatGPT responses are AI-generated references and may not always be precise. If anything looks incorrect or needs confirmation, contact the ARGOS Identity support channel directly.
## Next steps
* Explore additional prompt strategies in the `Developer-Guide-MCP` section.
* Combine ChatGPT **Custom Instructions** with MCP to keep answers aligned with your internal style.
* While developing, attach MCP to tools like Cursor so you can pull documentation without leaving the IDE.
## 4. Troubleshooting
* Confirm you are on ChatGPT Plus, Team, or Enterprise.
* Clear your browser cache and sign in again.
* Check **Settings & Beta → About** to verify that the client version is 2024.11 or later.
* Remove any trailing slash (`/`) from the URL and save again.
* Ensure `developers.argosidentity.com` is not blocked by your firewall.
* If you still get no response after 5 minutes, click **Reconnect** in the connector list to refresh the session.
* Connector settings sync at the account level, so deleting it on one platform removes it everywhere.
ChatGPT responses are AI-generated references and may not always be precise. If anything looks incorrect or needs confirmation, contact the ARGOS Identity support channel directly.
## Next steps
* Explore additional prompt strategies in the `Developer-Guide-MCP` section.
* Combine ChatGPT **Custom Instructions** with MCP to keep answers aligned with your internal style.
* While developing, attach MCP to tools like Cursor so you can pull documentation without leaving the IDE.